The CV joint on your boat is a vital component of the drivetrain. This coupling ensures that power from the engine is smoothly transmitted to the propeller shaft without jolts, even when the angle of the driveshaft changes. A damaged boot can lead to vibrations, noises, and even damage to your engine or gearbox.
In this blog, you’ll learn all about replacing a CV joint boot on a boat. What are the symptoms of wear? What parts do you need? How do you approach the installation? And where can you buy suitable products?
When should you replace your boat’s CV joint?
A worn or broken CV joint isn’t always immediately noticeable, but there are clear signs. Wear builds up gradually, and if you leave it too late, it can cause considerable damage. We’ve listed four signs that indicate wear and may point to a necessary replacement.
1. You’ll hear a ticking or knocking sound when cornering
One of the first signs of a failing CV joint is a ticking or knocking sound when accelerating or changing direction. This is often caused by play in the balls of the constant velocity joint. The longer you drive with this, the greater the risk of real damage.
2. You’ll notice vibrations or shudders in the drivetrain
If the constant velocity (CV) joint is no longer aligned with the rest of the drivetrain, vibrations will occur. You’ll often feel this in the steering wheel or the boat’s floor. The minimum angle between the engine and the shaft can be disturbed, making the drive unstable.
3. There’s a reduction in performance
If a CV joint is damaged, the connection between the engine and the output shaft can be less effective. Driving force won’t be transmitted properly, causing your boat to accelerate more slowly or reach a lower top speed. If you don’t address this, your CV joint will fail.
4. You see cracks in the dust cover
The rubber boot around the CV joint prevents dirt and water from reaching the moving parts. Do you see grease on the driveshaft or cracks in the boot? If the boot is torn, grease will escape. Loss of grease causes dry friction, leading to increased wear and ultimately a broken CV joint.
What parts do you need?
Replacing a CV joint on your boat requires a number of specific parts and tools. Don’t just think about the CV joint itself, but also about the fitting and alignment.
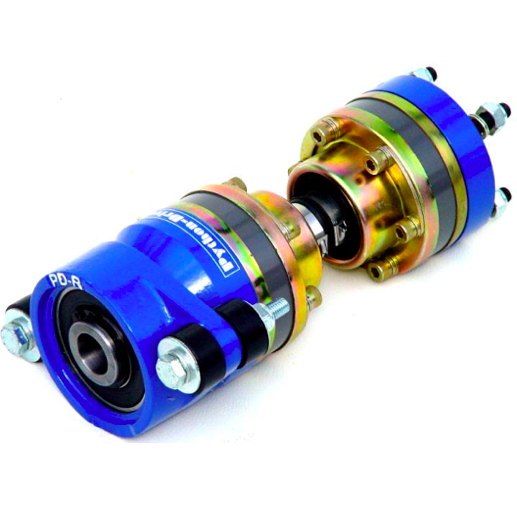
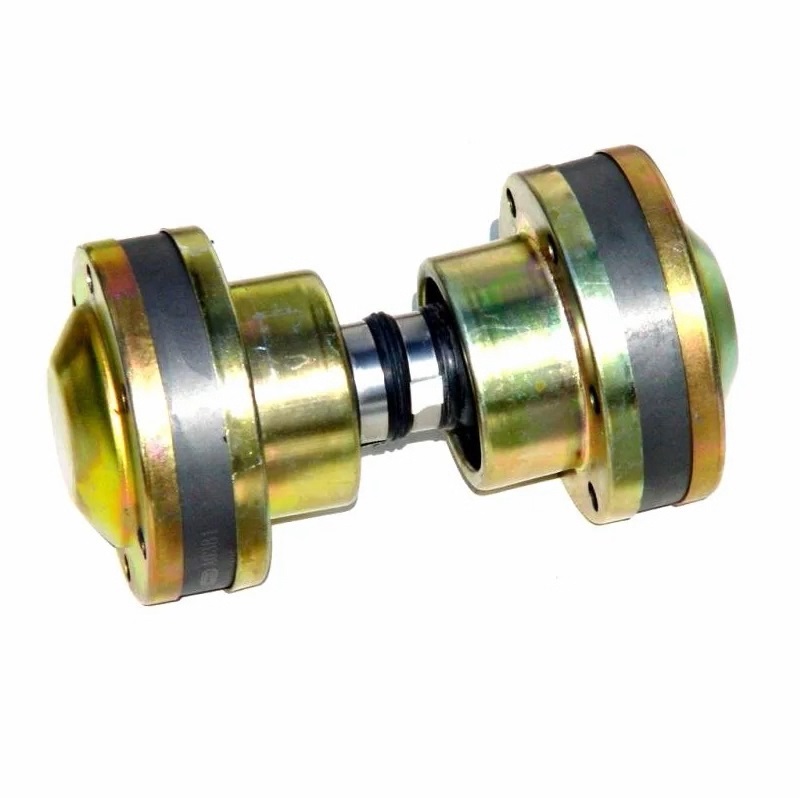
1. A new CV joint
The core of the job is, of course, a replacement CV joint. It is preferable to choose a high-quality version, such as a Python Drive CV joint. This is known for its reliability and long lifespan.
2. Adapter plate and propeller shaft clamp
For the fitting, you’ll often need an adapter plate to correctly attach the CV joint to the transfer box or output shaft. The set screw clamp ensures everything stays securely in place.
3. Soft engine mounts
When replacing, also check your engine mounts. The correct engine mounts help to dampen vibrations and ensure the engine stays neatly in place during driving.
4. New dust cover and rubbers
The dust cover protects the CV joint from dirt and water. A new cover is often included with replacement, along with the correct seals for a proper fit.
5. Fresh grease
Ensure fresh grease that is resistant to high temperatures and pressure. This will keep the balls in the CV joint well lubricated, extending its lifespan.
6. Bolts, nuts and fixings
New assemblies require robust fixings. Stainless steel bolts and nuts that can withstand the marine environment are preferable. As the drivetrain is subject to vibration, it is advisable to use a thread-locking compound. This prevents bolts from coming loose and extends the life of the fixings.
7. Toolsp
You will need a range of tools:
- Torque wrench
- Spanners
- Allen keys
- Tracking gauge
8. Alignment tools
Correct alignment between the engine and the drive shaft is important. Misalignment leads to excessive wear on both the CV joint and the gearbox. Use special alignment tools or have this carried out by a specialist.
Step-by-step plan: How to replace the CV joint
Replacing a CV joint on a boat is a job you can easily do yourself, provided you prepare properly. We’ll break the process down into seven steps:
Step 1: Check the condition of your current CV joint
Before you start dismantling, check the condition of the CV joint to see if it’s genuinely worn. Look for play, loss of grease, damaged gaiters, and noticeable vibrations while under way.
Step 2: Remove the old CV joint
Turn off the engine, let it cool down properly, and make sure the main battery isolator switch is off. Loosen all the bolts, remove the cover, and carefully pull the CV joint off the output shaft. Tip: have a rag ready for excess grease and dirt.
Step 3: Thoroughly clean the parts
Thoroughly clean the output shaft flange and the connection points on the gearbox. Remove old grease, rust, and dirt. A clean base prevents crooked mounting and unnecessary wear.
Step 4: Apply new grease
Generously lubricate the new CV joint with fresh grease. Use grease suitable for heavy-duty loads and marine applications. Don’t forget the inside of the gaiter and be careful not to get any dirt into the grease.
Step 5: Fit the new CV joint
Fit the new CV joint onto the shaft, secure the gaiter, and tighten the bolts crosswise to the correct torque (preferably use a torque wrench). Also, attach the adapter plate and screw clamp if necessary.
Step 6: Check the alignment
Use a tracking gauge or have a specialist check that the engine and prop shaft are correctly aligned. An incorrect angle can lead to propulsive thrust and extra wear.
Step 7: Test the drivetrain
Start the engine, engage forward gear and check for any vibrations or noises. Preferably, have someone watch during a short test run to identify any deviations early on.
Common mistakes when replacing a constant velocity joint
Replacing a CV joint yourself is quite doable, but some mistakes are lurking. We list five common mistakes.
1. Failing to properly seal the boot
A poorly fitted boot will let in dirt and water, accelerating wear. Always check that the boot is tight and properly sealed with the correct hose clips.
2. Using too little or the wrong type of grease
Grease is essential for the CV joint to function. Use grease that can withstand high pressure and marine conditions. Don’t be stingy: rather a bit too much than just too little.
3. Ignoring worn engine mounts
Worn or torn engine mounts cause engine movement and therefore unnecessary stress on the drivetrain. Check the condition of the mounts before you fit the new CV joint.
4. Not tightening mounting bolts to the correct torque
Too loose? They will vibrate and come loose. Too tight? You’ll strip the threads or damage the flange. Always use a torque wrench and follow the manufacturer’s torque values.
Frequently asked questions about replacing the CV joint
There are always questions about replacing a CV joint. Below, we answer the most common ones.
Can I replace a CV joint myself, or do I need to take it to the ship yard?
Many boat owners do it themselves, provided they have the right tools and parts. If you’re unsure about alignment or correct fitting, leave it to an experienced mechanic.
How long does a CV joint typically last?
That depends on usage, load, and maintenance. On average, 10 to 15 years with normal use and good lubrication.
How much does it cost to replace a CV joint?
The costs vary significantly, depending on the type of constant velocity joint and its application. Standard CV joints are available from approximately €500 to €1,000 for the parts. Python Drive systems start at around €577 (such as the P30-R) but can climb to well over €1,000, depending on the model, axle diameter, and maximum torque. For larger or more heavily loaded systems (like the P80-M), you’ll be looking at thousands of euros.
Always seek expert advice to determine the best type for your boat. Installation costs will be additional if you have it fitted professionally.
How do I know if my CV joint has the correct minimum angle?
Always Check the technical specifications of your engine, driveshaft, and propeller shaft. Systems, such as Python Drive, are designed to absorb angular changes, but alignment remains important.
Is there a difference between car and boat universal joints?
Certainly. A CV joint for a boat is built for heavier and longer-lasting loads, higher humidity, and saltwater resistance. Car CV joints are not suitable for marine use.
Buy your CV joint from AB Marine Service
At AB Marine Service, you’ll find a wide range of technical components for your boat. Among other things, we stock Python-Drive CV joints. Whether you’re tackling a project yourself or need assistance, we’re here to help.
If you want to be absolutely sure you’re choosing the right CV joint, please feel free to get in touch. Together, we’ll ensure your drivetrain runs smoothly and quietly again.