Posted on Leave a comment

Replacing a boat’s reverse gear: when it’s needed and what it costs

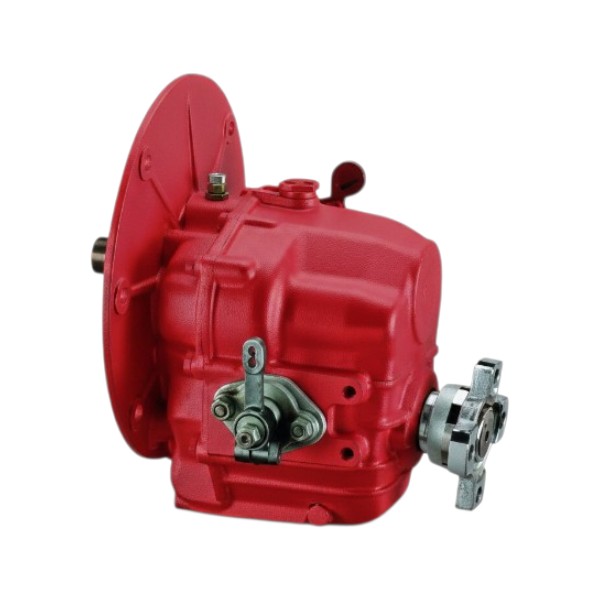
Technodrive TMC60A

You select forward gear, the engine revs climb, but the boat barely moves. Or you hear a rattling from the engine bay that wasn’t there last season. Replacing a reverse gear costs between €350 and €1,950 for parts, but in many cases, the coupling itself isn’t the problem.

In this blog, you’ll read which symptoms belong to which type of gearbox, which three things you should rule out first, and what the costs precisely consist of. This way, you’ll know whether to order a new one or check something simpler first.

What does a reverse gear do on a boat?

You use it every time you moor, without giving it a second thought. A reverse gearbox is the transmission between your engine and the propeller shaft that reverses the direction of rotation, can stop the propeller, and reduces engine speed by a fixed ratio.

Many boat owners are unaware of this last function. The rating plate will show a ratio such as 2:1 or 2.47:1, and this figure determines how many times slower the propeller shaft rotates than the engine. When replacing it, this ratio must be correct, otherwise the gearbox will not match your propeller.

For diagnosis, the type is especially important:

  • Mechanical reverse gear. The main shaft and auxiliary shaft are continuously connected via gears, reverse is via an extra gear. There is a small amount of oil in it which must be kept clean.
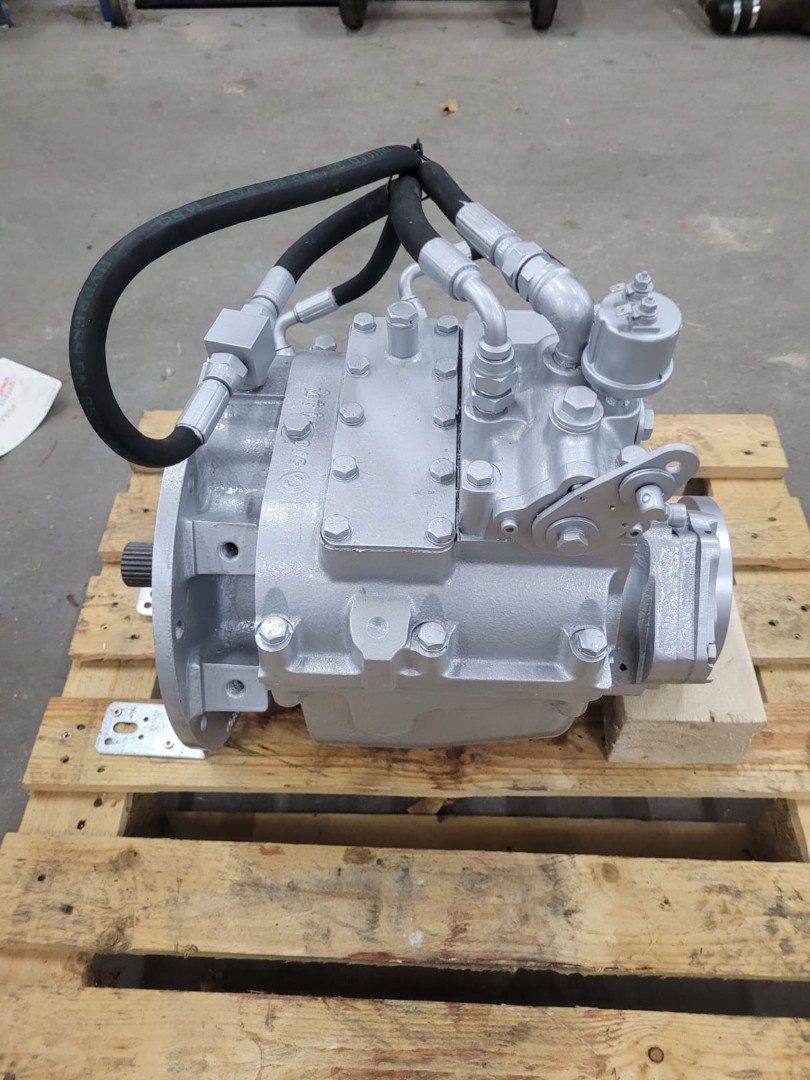
  • Hydraulic reverse gear. A plate clutch is pressed by oil pressure, operated via pistons. Here the oil does the work, so oil pressure and oil level are critical.

The type you have determines what complaints you get with wear. That makes the distinction the quickest diagnostic tool you have.

Reverse gear problems: broken or is it something else?

You hear or feel something, but you don’t know if it’s serious. The symptoms of a worn reverse gear differ by type, and it’s precisely those differences that tell you where to look.

Symptoms of a mechanical gearbox

  • Rattling from the engine bay. A rattling noise at idle or when engaging a gear indicates play in the gears or wear of the rotating parts.
  • Judder from the gearbox itself. A high, constant tone that follows the engine speed usually comes from the bearing.
  • Heavy or jerky gear changes. If the lever feels heavy, first check the cable, as this is a more common cause than the gearbox.
  • Cannot engage. If forward or reverse has completely disappeared, something has broken internally and continuing to sail is pointless.

Symptoms of a hydraulic gearbox

  • Slip. The engine speed rises, but the boat does not accelerate. With a hydraulic gearbox, this almost always means insufficient oil pressure or worn clutch plates.
  • Fewer knots at the same engine speed. If last season you were achieving 6 knots at 1800 rpm and now it’s 5, then the clutch is slipping under load.
  • Delayed engagement. A noticeable pause between lever and movement indicates oil pressure building up too slowly.

Why is my gearbox rattling?

Chattering and rattling often don’t come from the reverse gearbox itself. Between the flywheel and the reverser gearbox is the damper plate, a plate with springs or plastic pads that absorbs engine shocks. If these springs or pads wear out, the vibrations enter the drivetrain undamped, and you’ll hear this as rattling at low revs or a clatter when shifting.

Because the damper plate is attached to the reverser gearbox, the noise seems to come from there. If you recognise this pattern, first read how to replace your boat’s damper plate before considering a new gearbox.

Carry out these checks before ordering a new clutch

You’ve recognised the symptoms and are thinking about replacement. However, there are four points that are more often the cause than the reverser gearbox itself, and you can check them all in an hour.

  • Oil level and oil type. A reverser gearbox that runs dry wears out quickly and overheats. Too much oil is just as bad, as it builds up pressure. Check which oil your model requires in the manual, as mechanical and hydraulic clutches don’t ask for the same thing.
  • The condition of the oil. Does the oil smell burnt, or do you see metal particles on the dipstick? Metal particles mean something is already wearing down internally, and fresh oil won’t be a solution anymore.
  • Cable, operation and adjustment. In many cases, stiff gear changes are due to a seized or incorrectly adjusted gear change cable, not the clutch. Feel if the lever moves without resistance when you disconnect the cable at the clutch.
  • Engine mounts and alignment. Sagging engine mounts pull the drivetrain out of alignment, putting sideways stress on the gearbox bearings. Therefore, check the alignment of your propeller shaft as well.

There is another cause that is not a defect but a habit. Accelerating before engaging the clutch, or shifting directly into reverse from full speed, puts heavy strain on the plates and gears. Engaging the clutch first and then accelerating extends the lifespan of every gearbox.

If these points are satisfactory and the complaints persist, you’ll be looking at a rebuild or replacement.

Service or replacement: when do you choose which?

The size of your gearbox often determines half the answer. With a small, light gearbox, refurbishment is rarely worthwhile: dismantling, measuring, cleaning, and rebuilding it takes just as many hours as with a heavy gearbox, while a complete used or new unit is relatively inexpensive. The labour costs quickly exceed the price of a replacement gearbox.

Replacement is the logical choice in cases of internal damage, recurring faults, and when you need to get back on the water quickly mid-season.

PRM 120D2.5 mechanical reverse gearbox

How much does it cost to replace a reverse gear?

You want to know where you stand before you let someone take a look. The gearbox itself is the biggest item: used reverse gearboxes range from approximately €350 for a small mechanical Technodrive TMC40 to approximately €1,950 for a heavier ZF25 or a Kanzaki KM4a. The majority of the offerings are between €450 and €750.

What determines the price within that range:

  • Type and format. A Hurth HBW50 for a 20 hp engine costs €450, a ZF25 for a considerably larger engine €1,950. Hydraulic gearboxes are structurally more expensive than mechanical ones.
  • The ratio. The reduction must match your propeller. A 2:1 is readily available, a different ratio like 2.63:1 limits your choice and thus your price advantage.
  • New or used. A new gearbox from Technodrive or PRM costs more than a used one from stock, but you get something back for it: a warranty, a known history, and parts that will remain available for years to come. If you sail a lot, the boat is your home or your work, or you simply want to have no worries for years to come, then new is the most peaceful choice.

In addition to the gearbox, these costs will be added:

  • Removal and installation. The gearbox needs to be supported and sometimes the engine has to be lifted slightly. In a cramped engine room, this accounts for the majority of the labour time.
  • Blanking plate. Include that straight away, because you’re there anyway and a worn plate will ruin your new gearbox.
  • Oil and seals. Fresh oil of the correct type should be part of a replacement as standard.
  • Alignment after reinstallation. The flanges must be realigned parallel; otherwise, you will immediately put new stress on the new coupling.

Order your parts from us, and we’ll ship for €6.95 within the Netherlands, and for free on orders over €125. New items come with a two-year warranty.

Do the job off-season if you can. In the spring, workshops are full, and you’ll be waiting longer than in november.

Which gearbox is right for your boat?

Replacing a gearbox starts with the nameplate and not the webshop: without make, type, and ratio, you cannot determine which gearbox fits. Browse the selection of used gearboxes, or send us this information and we’ll find it for you:

  • Make, type and ratio of your current gearbox. They are on the nameplate on the housing.
  • Make, type and power of your motor. This allows us to check if the coupling can handle the torque.
  • The symptoms and when they occur. Slipping under load indicates something different to rattling at idle.
  • What the oil reveals. Colour, smell, and any metal particles reveal a lot about the internal condition.

Call 0514-745007 or send a message via WhatsApp. With that information, we can tell at once if we have a suitable coupling in stock.

Posted on Leave a comment

Connecting your boat’s electrics: how to manage onboard power

Je hebt een mooie dag op het water achter de rug, de motor heeft goed gelopen en je verwacht dat de accu weer vol zit. Toch merk je na een paar dagen aan de wal dat de koelkast het lastiger krijgt, de lichten wat doffer branden, of de motor net iets trager start. De oorzaak zit meestal niet in een kapotte accu, maar in de manier waarop je boordnet is aangesloten. In deze blog leggen we uit hoe je de vier kernonderdelen van je boot elektra aansluit: de accu, de acculader, de omvormer en het zonnepaneel met MPPT-regelaar. Zo weet je precies welk onderdeel wat doet en waar je op moet letten. Of je nu een klein motorbootje of een groter vaartuig hebt, elektrische systemen aan boord bestaan uit dezelfde basisonderdelen, en bij het installeren van je boot elektra is de volgorde net zo belangrijk als de onderdelen zelf.


Onboard power: how the four components work together

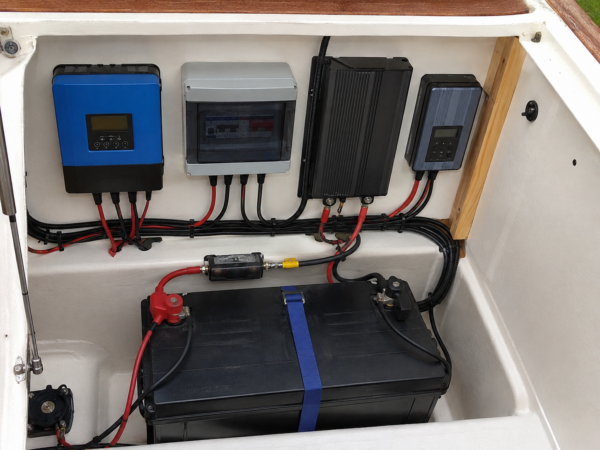
Je boot elektra bestaat uit vier onderdelen die elkaar aanvullen, en samen vormen ze de stroomketen aan boord. Alle elektrische componenten aan boord zijn met elkaar verbonden: de accu is verbonden met de acculader, de omvormer en het schakelpaneel, van waaruit je de elektriciteit verdeelt naar losse verbruikers zoals verlichting, pompen en navigatie-instrumenten. Zonder een van deze schakels werkt de rest minder efficiënt: een omvormer zonder goed opgeladen accu heeft weinig reserve, en een zonnepaneel zonder juiste regelaar laadt de accu niet optimaal op.


    • Battery: stores electricity and supplies power to everything you use on board, from lighting to the inverter.
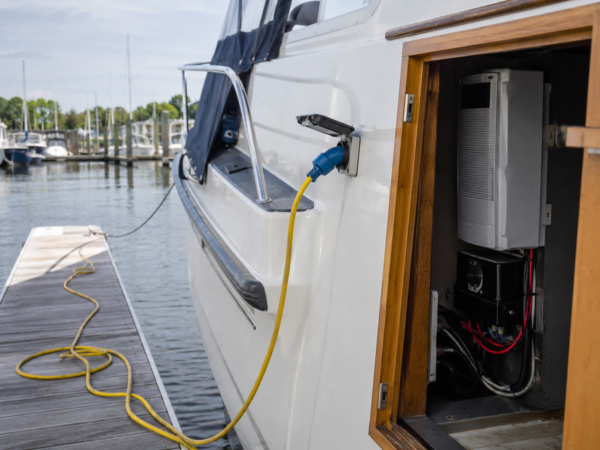
    • Battery charger: tops up the battery as soon as you connect to shore power, so the battery doesn’t remain structurally below 100%.
    • Inverter: converts the stored 12V or 24V direct current to 230V, allowing household appliances to work even without shore power.
    • Solar panel with MPPT controller: keeps the battery topped up while sailing or at anchor, precisely at times when you don’t have shore power.


    •  

      Of je nu een weekend weg bent of langere tochten maakt, de belasting op je boordnet verschilt sterk. Vaar je vooral korte dagtochten, dan is de acculader thuis of in de haven vaak voldoende om de accu weer vol te krijgen. Lig je regelmatig voor anker of maak je langere reizen, dan wordt het zonnepaneel met MPPT-regelaar belangrijker om de accu overdag bij te houden zonder dat je de motor extra hoeft te laten draaien.


      Connecting the battery: the foundation of your power supply

      De accu is het startpunt van je boot elektra: elk ander onderdeel sluit uiteindelijk op de accu aan. Op de meeste boten vind je een AGM- of lithiumaccu.


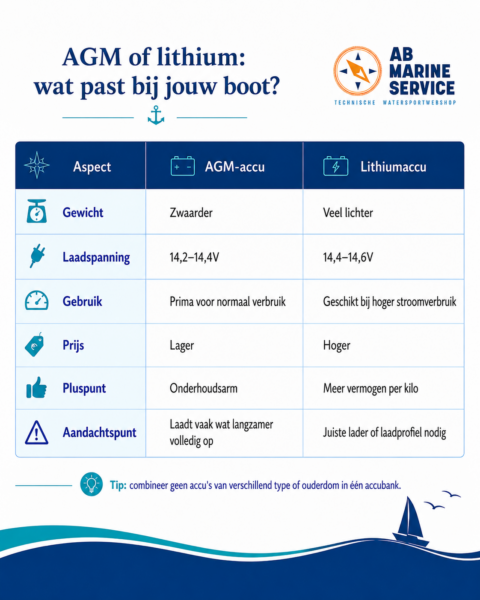
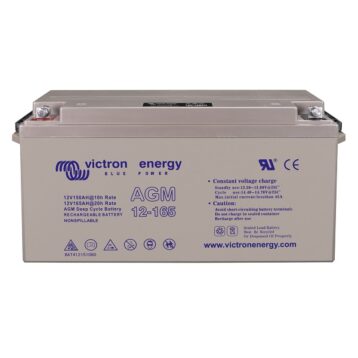
        • AGM battery: cheaper to purchase, delivers a high starting current. However, you can only use about half of the capacity, as deep discharge quickly shortens its lifespan.
        • Lithium battery: lighter, charges faster and you can use 80 to 100 percent of the capacity. However, it is more expensive to purchase, with its own charging profile.


        •  


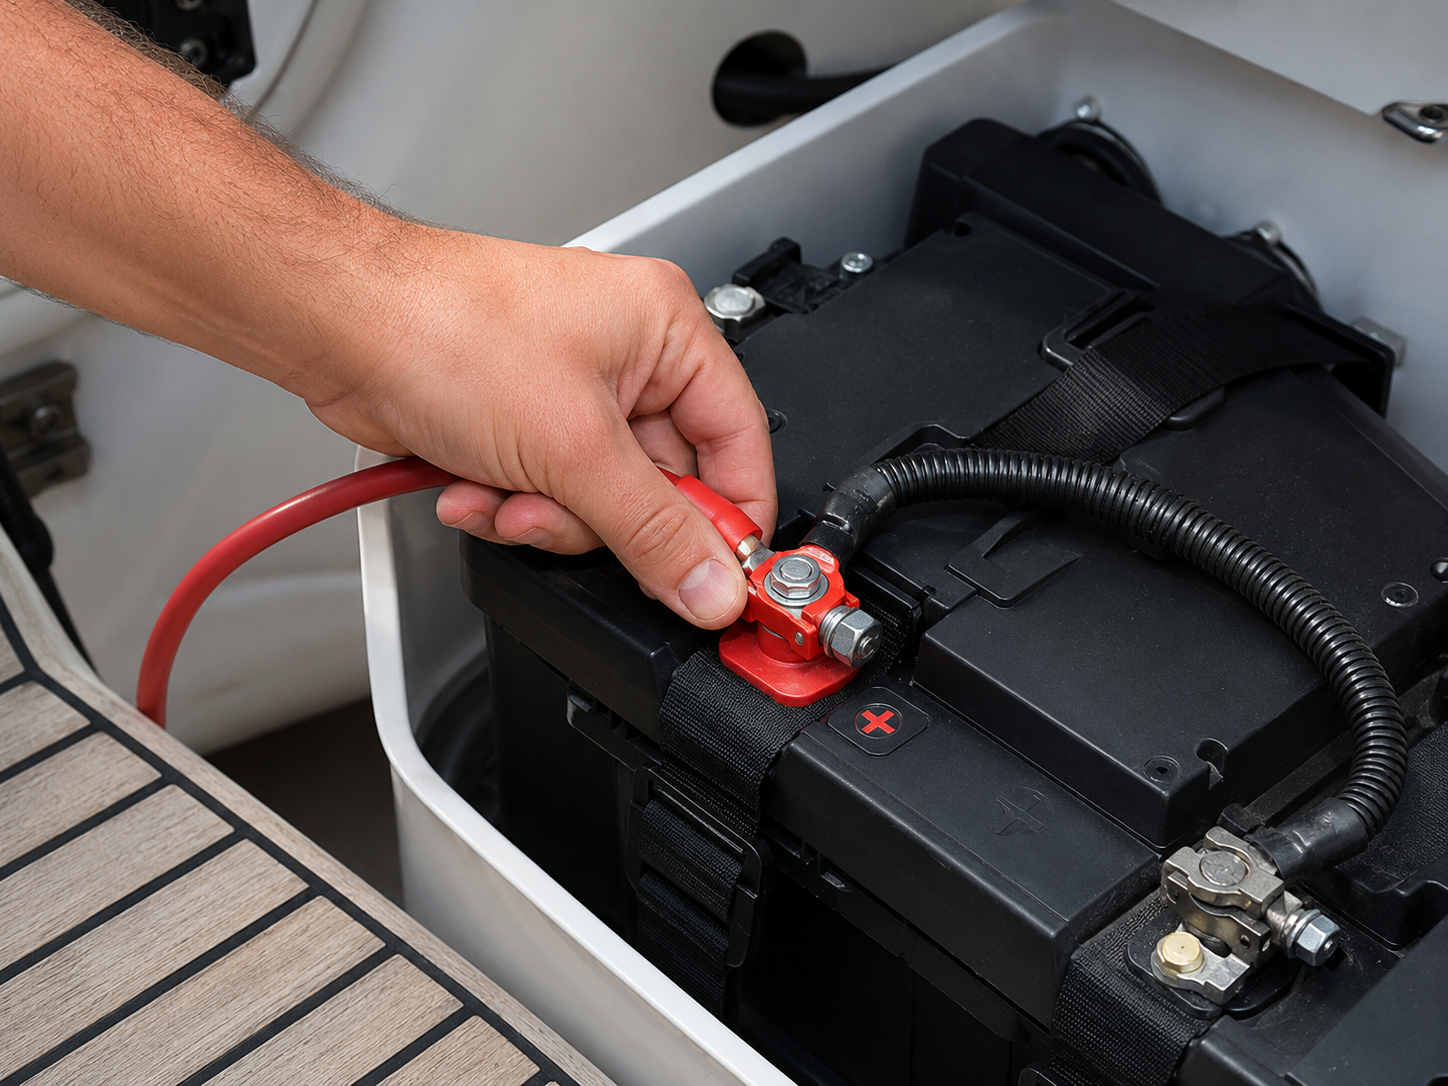
          Battery connection sequence


            1. First, connect the positive cable.
            2. Next, connect the negative cable.
            3. To disconnect the battery, reverse the order: disconnect the negative cable first, then the positive cable.


            4. Deze volgorde voorkomt kortsluiting via het gereedschap dat je gebruikt. Gebruik hiervoor altijd accukabels en accupoolklemmen van de juiste dikte, afgestemd op de stroomsterkte die erdoorheen gaat.


              Connecting batteries in parallel or series

              Je kunt meerdere accu’s op verschillende manieren met elkaar verbinden: parallel of in serie, en het verschil zit in wat er met spanning en capaciteit gebeurt.


                • Parallel switching: you connect the positive terminals to each other and the negative terminals to each other, so that the voltage remains the same (e.g. 12V) but the capacity in ampere-hours adds up. Suitable for a larger domestic battery bank that you want to use for longer without recharging.
                • Series switching: you connect the positive of one battery to the negative of the other, so that the voltage adds up (two 12V batteries then become 24V) while the capacity remains the same. Used when your onboard electrical system, for example for a heavy inverter or electric bow thruster, runs on a higher system voltage.


                • Combineer nooit accu’s van een verschillend type of een verschillende ouderdom in dezelfde bank, want dit zorgt voor ongelijke belasting en versnelde slijtage van de zwakste accu in de bank. Meer over de stappen en veelgemaakte fouten lees je in onze blog over accu’s parallel of in serie schakelen.


                  Common mistake: reversed polarity

                  Een pluskabel op de minpool aansluiten is de meest voorkomende fout bij het aansluiten van een boot accu. Verkeerde polariteit veroorzaakt kortsluiting, beschadigt aangesloten apparatuur en kan de accu zelf onherstelbaar beschadigen. Op de accu staan de polen gemarkeerd, dus de fout zit bijna altijd in de kabels. Controleer met een multimeter welke kabel plus is voordat je hem vastzet, vooral in een installatie die iemand anders heeft aangelegd of waar niet netjes met rood en zwart is gewerkt.

                  Voordat je aan de slag gaat met boot elektra aanleggen, is het verstandig een elektrisch bedradingsschema te maken van alle verbindingen. Dit schema toont precies hoe de accu, acculader, omvormer en zonnepaneel met elkaar verbonden zijn, en helpt bij het opsporen van problemen achteraf. Monteer daarnaast tussen de accu en de rest van de installatie een hoofdschakelaar, zodat je bij onderhoud of in noodgevallen in één handeling alle stroom kunt uitschakelen.


                  Connecting a battery charger: smart charging of your batteries

                  Een acculader zorgt voor de juiste laadspanning en laadstroom, afgestemd op het type accu dat je aan boord hebt.


                    • An alternator supplies a single fixed voltage, usually between 13.8 and 14.4V, without an absorption phase. As a result, it never fully charges a domestic battery bank.
                    • An AGM battery requires approximately 14.4V absorption voltage and then 13.8V float.
                    • A lithium battery charges at Victron to 14.2V absorption and 13.5V float as standard. Other brands sometimes specify 14.4V to 14.6V. Always follow your battery manufacturer’s specification and not a rule of thumb.


                    • Een acculader is daarmee de meest voor de hand liggende oplossing om je accu structureel vol te houden, en een juiste aansluitvolgorde is essentieel om schade aan je boot elektra te voorkomen. Zonder acculader blijft je accu structureel onder de 100%, wat op termijn de levensduur verkort. Naast walstroom kun je de acculader ook voeden vanuit een generator aan boord, handig wanneer je langere tijd niet aanmeert. Lees ook onze blog over je accu volledig opladen voor meer achtergrond.


                      Mains power as the basis for the battery charger

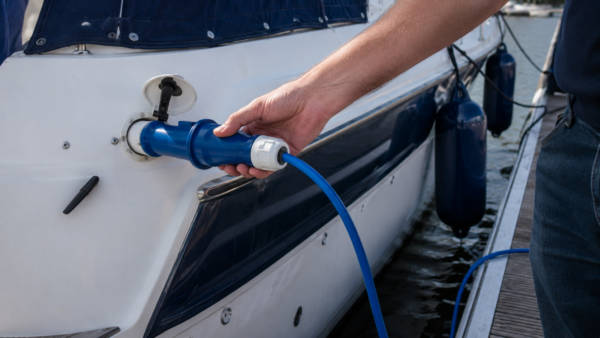
                      De acculader haalt zijn stroom meestal uit een walstroomaansluiting in de haven. Gebruik hiervoor een walstroomkabel met een spatwaterdichte stekker (minimaal IP44, bij voorkeur IP67 of hoger), zodat vocht op de steiger geen risico vormt. Sluit de walstroomaansluiting aan boord altijd aan via een aardlekschakelaar, want deze onderbreekt de stroom automatisch bij een lekstroom en voorkomt daarmee elektrocutiegevaar aan boord of in het water rondom de boot.


                      Battery charger connection sequence


                        1. Connect the red positive lead of the battery charger to the battery.
                        2. Connect the black negative lead of the battery charger to the battery.
                        3. Only connect the battery charger to the shore power outlet, such as a socket or shore power pedestal, afterwards.
                        4. Switch on the battery charger and select the correct charging profile for AGM, gel or lithium.


                        5. Veel acculaders aan boord hebben twee of drie uitgangen, waarmee je een startaccu en een huisaccu tegelijk maar onafhankelijk van elkaar oplaadt. Zo voorkom je dat de startaccu leegloopt doordat de huisaccu voorrang krijgt, en andersom. Let op: bij een acculader met meerdere uitgangen geldt één laadprofiel voor alle uitgangen. De uitgangen zijn onderling gescheiden, maar je kunt ze niet los instellen op een ander accutype. Heb je een AGM startaccu en een lithium huisaccu, neem dan twee losse laders of laad de huisaccu bij via een DC/DC lader.


                          Common charging errors


                            • Setting the wrong charging profile: setting a lithium charging profile on a lead-acid battery will structurally damage the battery, so always check the battery type before choosing the profile.
                            • Using cables that are too thin: thin cables cause voltage drop and overheating, so choose a cable thickness that is suitable for the charger’s charging current.
                            • Placing the charger in a damp location: moisture near the battery increases the risk of a short circuit, even if the charger itself is splash-proof.


                            •  

                              Connecting an inverter for 230V on board

                              Een omvormer zet de 12V of 24V gelijkstroom van je accu om naar 230V wisselstroom, zodat je gewone stopcontact-apparatuur kunt gebruiken zonder walstroom. Let bij het aansluiten op de volgende punten:


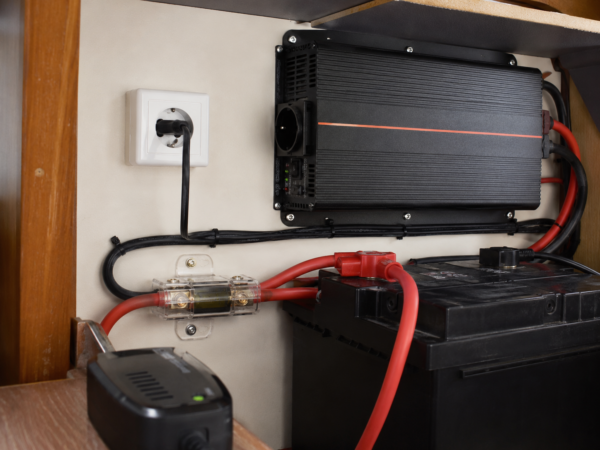
                                • Connect the inverter close to the battery to keep the cable length short.
                                • Do not place the inverter directly above the battery due to gassing during charging.
                                • Use cables that match the inverter’s power output.
                                • Locate a fuse as close as possible to the battery, so that a short circuit further down the cable is quickly interrupted.
                                • Choose an inverter specifically built for the marine environment: moisture, salt, and vibrations will affect a standard inverter more quickly than a model with a marine casing.


                                •  


                                  Earthing and earth connection

                                  Een combi apparaat zoals een MultiPlus heeft een AC ingang en schakelt de aarding automatisch om zodra je van walstroom naar de omvormer overgaat, en weer terug. Dit zorgt dat de aarding automatisch goed staat zodra je overschakelt van walstroom naar de omvormer, en weer terugschakelt zodra je walstroom aansluit. Zonder deze koppeling loop je risico op een verkeerd geaard systeem, wat gevaarlijk is bij een lekstroom, vooral in combinatie met de aardlekschakelaar die je bij de walstroomaansluiting gebruikt.

                                  Gebruik je een losse omvormer zonder AC ingang, dan gebeurt dat niet automatisch. Regel het overschakelen dan met een overschakelrelais zoals een Filax, zodat je nooit twee bronnen tegelijk op dezelfde groep hebt en de aarding altijd goed staat.


                                  How much power do you need?

                                  Tel het gezamenlijke vermogen in watt van alle apparaten die je tegelijk wilt gebruiken bij elkaar op, en kies een omvormer met voldoende marge boven dat totaal. Een koffiezetapparaat van 1000 watt en een laptoplader van 65 watt vragen samen dus minimaal 1065 watt aan omvormervermogen. Houd bovendien rekening met de inschakelstroom van apparaten met een motor, zoals een koelkastcompressor, want die kan tijdelijk twee tot drie keer het normale vermogen vragen bij het opstarten.


                                  Connecting a Victron MPPT: Harnessing Solar Power

                                  Een MPPT-regelaar, wat staat voor Maximum Power Point Tracking, haalt het maximale vermogen uit je zonnepaneel en zet dit om naar de juiste laadspanning voor je accu. Ook op bewolkte dagen of tijdens het varen voorziet een zonnepaneel met MPPT-regelaar je accu van een merkbare hoeveelheid stroom, in tegenstelling tot een eenvoudigere PWM-regelaar die minder rendement uit het paneel haalt.


                                  ECorrect connection order for a Victron MPPT controller


                                    1. First, connect the battery to the MPPT controller.
                                    2. Only then connect the solar panel.


                                    3. Deze volgorde is nodig omdat de regelaar bij het inschakelen automatisch de systeemspanning detecteert op basis van de accu. Sluit je eerst het paneel aan, dan kan dit de detectie verstoren en in het ergste geval de regelaar beschadigen.


                                      Points to consider during configuration


                                        • The panel voltage must be at least 5V higher than the battery voltage before the controller starts charging. It then continues until about 1V above the battery voltage.
                                        • Do not use solar panels with built-in optimisers, as these can permanently damage the MPPT controller.
                                        • If you’re unsure about the correct combination of panel wattage and controller, use an MPPT calculator to match the panel wattage to the capacity of your battery bank.


                                        •  

                                          Maintenance and inspection of your boat’s electrics

                                          Onderhoud van je boot elektra hoort bij een veilige installatie, ook nadat alles goed is aangesloten. Regelmatig onderhouden van accupolen, zekeringen en kabels voorkomt onnodige storingen en verlengt de levensduur van elk onderdeel.


                                            • Battery terminals: check at least once per sailing season for corrosion, as a white or green layer on the terminals increases contact resistance and causes voltage loss. Clean corrosion with a small steel brush and then use terminal grease to prevent new corrosion.
                                            • Fuses: check that all fuses still have the correct rating for the connected cable thickness, and always replace a blown fuse with one of the same amperage. A fuse that is too heavy will no longer adequately protect the cable in the event of a short circuit, while a fuse that is too light will blow unnecessarily often.
                                            • Cables: inspect for cracks, breaks, or damage from chafing against sharp edges, especially where cables run along the hull or through a bulkhead.


                                            • Bij een gecombineerde acculader-omvormer, ook wel een combi-unit genoemd, kun je via de Victron Connect app op je telefoon meekijken met laadstroom, accuspanning en het actuele verbruik, zolang je binnen bluetooth bereik bent. Dit maakt het makkelijker om op tijd te zien of een van de vier onderdelen niet naar behoren werkt, voordat dit leidt tot een lege accu aan boord.


                                              Onboard power supply in order

                                              Met de accu als basis, de acculader en het zonnepaneel als aanvulling, en de omvormer als schakel naar 230V, regel je de stroom aan boord op een manier die meegaat met langere tochten en langere periodes voor anker. Elk onderdeel van je boot elektra vraagt om de juiste aansluitvolgorde en het juiste vermogen, zoals hierboven per onderdeel beschreven.

                                              Twijfel je over de juiste Victron acculader, omvormer of MPPT-regelaar voor jouw boot? AB Marine Service is gespecialiseerd in boot elektra en heeft een ruim assortiment Victron producten op voorraad, van accu’s en laders tot complete laadsystemen. Onze specialisten bieden deskundig advies op maat, afgestemd op jouw vaartuig en vaargedrag, en helpen je graag bij het oplossen van problemen zoals een lege accu of een verkeerd aangesloten omvormer. Neem gerust contact met ons op voor een offerte of persoonlijk advies.


                                              In what order do you connect everything?

                                              Start with the battery, then connect the battery charger, then the inverter, and finally configure the MPPT controller with the battery connection first and only then the solar panel.

                                              WWhat happens if the polarity is connected incorrectly?

                                              Connecting the positive and negative terminals incorrectly will cause a short circuit and can irreparably damage both the battery and connected equipment, so always check the polarity with a multimeter before securing cables.

                                              How much power do you need for your inverter?

                                              Add up the power consumption of all the devices you’ll be using simultaneously and choose an inverter with enough headroom above that total, so that peaks in consumption don’t immediately cause an overload.

                                              Which battery type suits your boat: AGM or lithium?

                                              Opt for an AGM battery if the purchase price is more important than weight, or if you need to charge in the cold. Choose lithium if you want to use a lot of capacity, save weight, and charge quickly. For the same nominal capacity, a lithium battery weighs about half as much as an AGM battery. In terms of usable capacity per kilo, the difference is even greater, as you can use almost all of a lithium battery’s capacity, whereas with AGM, it’s about half.

Posted on Leave a comment

Connecting a bilge pump: a step-by-step guide for safe installation

On a boat, there are numerous ways for water to find its way in. Whether it’s rainwater, water from the pipes, a leaking propeller shaft, or spray during sailing: some rainwater often ends up in the bilge.

The bilge is the lowest part of a ship, where the two sides meet to form the keel. This is where water, oil, mud, and other rubbish can collect. You ideally want to keep this area clean and dry.

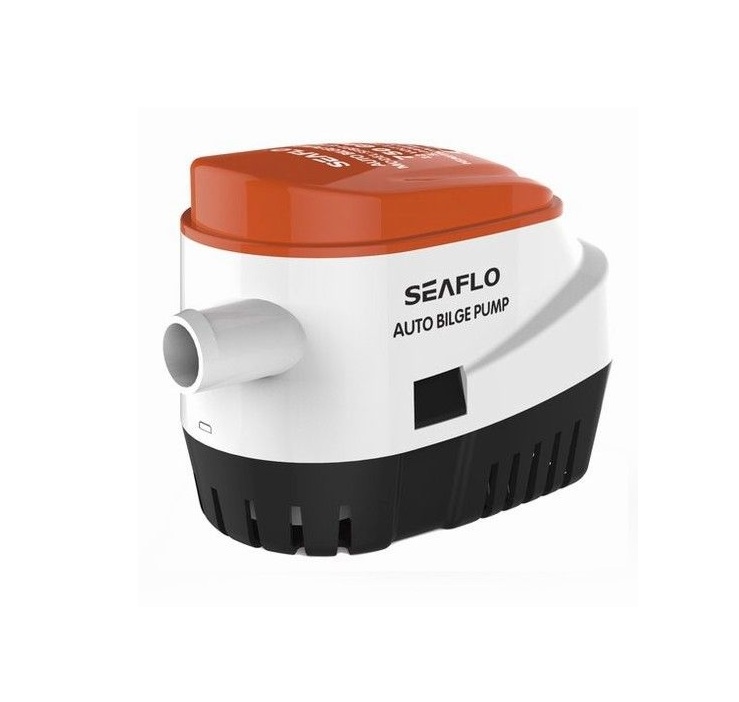
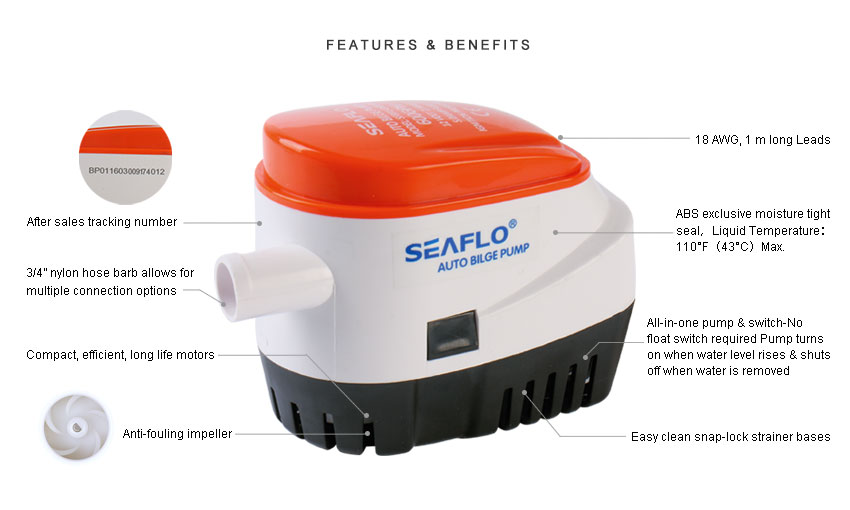
The solution for dampness and dirt in the bilge is a reliable bilge pump. At AB Marine Service you’ll find automatic bilge pumps that do the work themselves as soon as there’s water in the bilge. This way you don’t have to keep an eye on whether pumping is needed.

What a bilge pump does

The bilge pump has a number of functions. Without a bilge pump, your vessel could become heavier, unstable, or sustain damage. In the worst-case scenario, it could even sink your boat. Naturally, we’d rather avoid that.

Pumping water out of the bilge

The main job of the bilge pump is to pump out water that’s ended up in the bilge. This could be rainwater, or water that’s got in through a leak or spray. That’s why a bilge pump is always fitted at the lowest point of the bilge, because water collects there and can be pumped out efficiently.

Protection against oil and debris

The bilge can accumulate much more than just water. Think of small residues of oil, dirt, or even diesel. A strong pump prevents this muck from building up and potentially causing damage. It’s important, however, to regularly check the pump and hoses for blockages or debris.

How does a bilge pump work?

There’s a range of bilge pumps on the market. The key difference is between manual and automatic models.

Manual bilge pump with switch

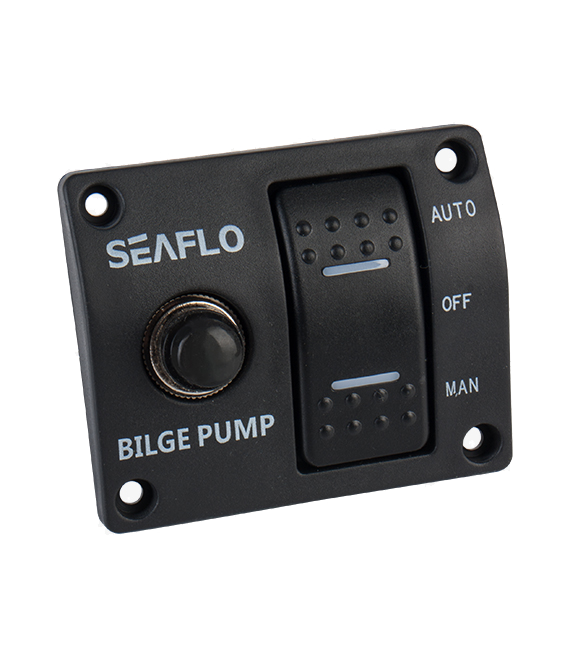
With a manual bilge pump, you operate the pump yourself using a switch or a control panel. This allows you to decide when to turn the pump on and off. You’ll need to be the one monitoring whether pumping is actually required, though.

Automatic bilge pump with built-in float

When a pump has automatic operation, it has a float switch or built-in float. As the water level rises, the float moves up, and the pump switches on automatically. It then pumps out the bilge water until the level drops below a certain point again.

What do you need to connect a bilge pump?

Connecting a bilge pump is a job most DIYers can manage quite well. The aim is a safe and watertight connection for the pump, with no risk of a short circuit. Make sure you have the following bits and bobs to hand:

Connecting the bilge pump: step-by-step explanation

Right then, time to get that bilge pump wired up. We’ll walk you through it in five straightforward steps. If you’re missing a bit or fancy asking a question, just give our experts a shout.

Step 1: Choose the right location

Find the location of the bilge pump. You’ll want the pump in the lowest part of the hull, as that’s where all the water will drain. Ensure the pump is securely mounted and easy to install. Allow ample space for the hose and wiring.

Step 2: Connect the hose

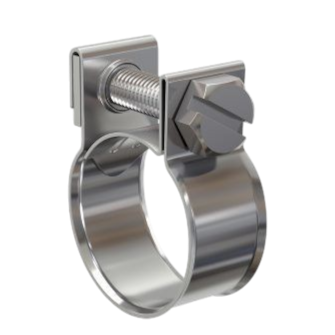
Attach the drain hose to the pump. Use one or two hose clamps to create a secure and watertight seal. Route the hose upwards, ensuring the outlet always remains above the waterline. This prevents water from flowing back down the hose.

Step 3: Wiring and fuse

Connect the pump to the boat’s power supply. Always fit a separate fuse between the pump and the battery to prevent short circuits or overloading. Neatly conceal the wiring and use waterproof connectors or heat-shrink tubing to prevent corrosion.

Step 4: Switch or automatic mode

Figure out how you want to run the pump. For manual operation, you’ll connect the pump to a switch or a control panel. If you’re going for an automatic setup, you’ll use a float switch. A lot of bilge pumps give you the option to have both.

Step 5: A thorough test

Run a pre-sail installation test. Pour a controlled amount of water into the bilge and check if the pump activates. Ensure there are no leaks at the connections and that the drainage functions as expected. A test run will prevent unwelcome surprises out on the water.

Practical tips for a reliable bilge pump

For the bilge pump to work reliably, here are a few more tips. We’ve put them in a list for you.

  • Consider placing the pump in a holder or fitting a small shelf beside it. This will stop the pump from getting mucky or sitting directly in any loose debris.
  • Never install wiring without a fuse. Such a simple fuse can save your entire vessel in the event of a short circuit.
  • When selecting a pump, be sure to factor in its capacity. For bigger boats, you’ll likely require a pump with a greater litres-per-hour output.
  • Always use a non-return valve. This prevents the pumped-out water from flowing back and refilling your bilge.

Frequently asked questions about bilge pumps

We regularly get the same questions about bilge pumps. Therefore, we’re providing some answers to such questions. If your question isn’t here, please don’t hesitate to get in touch.

My bilge pump keeps running. What should I do?

If your automatic bilge pump keeps running, then the float switch is sticking. This can be due to wear and tear or the build-up of dirt or oil. If the pump continues to run, clean it and see if that helps. If not, it’s probably time for a new pump.

Where should the discharge hose lead?

Ensure the drainage hose always exits above the water level. This allows the water to escape freely. We advise against excessive bends in the hose and suggest using hose clips to prevent any leakage.

Does the pump always have to operate automatically?

No, that’s not strictly necessary. Some people prefer manual control to maintain more oversight. Generally, an automatic pump is considered safer, as it will activate even if there’s a leak and you’re not on board.

How do I know if it’s working without water in the bilge?

Ideally, you should test the bilge pump every few weeks when the boat is in the water. Especially if the boat’s been moored for a while or is connected to shore power. Just chucking a bucket of water into the bilge is enough to see if the pump’s still doing its job.

What do you need for large or small motorboats?

For small motorboats, a standard bilge pump will suffice. On bigger boats, you’ll have a deeper bilge and might need a pump with a higher capacity. In that case, it’s sensible to opt for a bigger, more powerful pump.

Buy a bilge pump and more at AB Marine Service

At AB Marine Service, we have everything your boat needs. Order your automatic bilge pump with built-in sensor, including all the connection materials you need to get started safely on board. Do you have any questions? Feel free to get in touch. We’re happy to help.

Posted on Leave a comment

Flushing the engine: cleaning the internal oil system of your engine.

If you have a marine diesel, you’ll know: maintenance not only determines how smoothly the engine runs, but also how reliable it remains. Yet, we see with boat owners (for example, with a Volvo Penta) that one maintenance step is regularly skipped or remains a bit vague: flushing the engine.

Flushing can help loosen contaminants and deposits in the oil system, particularly in older engines, when there’s uncertainty about their maintenance history, or if the engine frequently idles. In this blog, we’ll explain what engine flushing is, when you should or shouldn’t do it, and what it generally costs.

What is engine flushing?

Engine flushing is the cleaning of the internal oil system. You add a special cleaning agent to the old engine oil, then run the engine briefly according to the product’s instructions, and then drain the oil. The aim is to loosen sludge and accumulated deposits from the crankcase and oil channels, so that this contamination is removed with the old oil. Afterwards, you replace the oil filter and fill with new oil.

On marine diesels, you sometimes see varnish deposits: a thin, sticky film that can range in colour from golden to brown. This can be caused not only by a engine not reaching its operating temperature but also by extended oil change intervals, a lot of idling/low-load running, prolonged periods of inactivity, and contamination (such as water or a bit of diesel in the oil). This deposit can impair lubrication and cause parts to move less smoothly. With heavy contamination (sludge), there’s even a risk that oil passages or a strainer could become partially blocked, which is why flushing is something you undertake deliberately and properly.

When is it advisable to flush an engine?

You don’t need to flush your engine with every service. However, in some cases, it has clear advantages. We’ll list those cases for you.

When the engine doesn’t run much

Boat engines that run infrequently often benefit from a flush. This is because they don’t often reach operating temperature, and the stagnant oil ages. This can lead to contamination, (partial) blockages, and the formation of acids and ‘black sludge’ in the crankcase. A flush can reduce this.

When the engine idles a lot

Also when the engine primarily runs at idle, the system doesn’t always reach an optimal temperature. This promotes oxidation of the engine oil and lacquer deposits. This, therefore, affects lubrication and the oil’s performance. In cases of heavy soiling, it can even (partially) block oilways.

When the engine has direct cooling

In the case of direct-cooled diesel engines, they often run cooler than closed systems. This gives dirt and the formation of ‘black sludge’ more of a chance. For direct-cooled engines, it can therefore be advisable to flush them slightly more often, especially if the engine runs at low load a lot or the maintenance history is unclear.

When the maintenance history is unknown

Perhaps you’ve bought a boat with an unclear maintenance history. In that case, the oil might not always have been changed on time. A flush reduces the risk of hidden contamination in the engine block and ensures a fresh start.

When the engine oil is old

If engine oil remains in the block for too long, it loses its lubricating and cleaning properties. Additives become depleted, dirt can accumulate, and acids may start to form. This leads to increased wear on components such as the bearings.

Should you have further doubts about the engine’s condition, it can also be helpful to follow a step-by-step guide for cleaning an diesel engine. Also in the case of a smoking diesel engine solutions are possible.

In what ways can you flush an engine?

There are several ways to flush an engine. Depending on the extent of the deposits, you can opt for using a cleaning agent, flushing with a standard flushing oil, or flushing with a more powerful flushing oil. We will cover these three options.

Add Oil System Flush to used oil

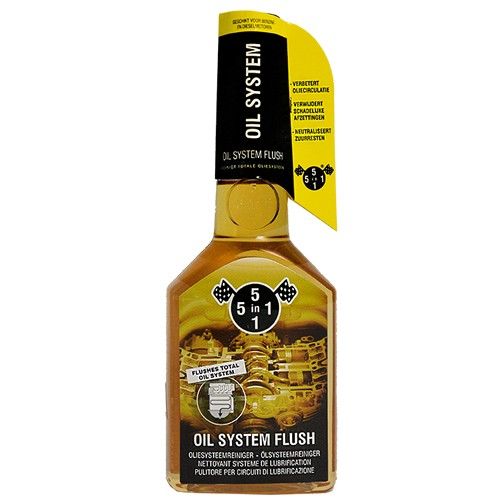
The most popular and cost-effective way to flush your engine is with a cleaning agent. We recommend Oil System Flush. This is a concentrated cleaner that you add to the old, warm engine oil before draining it.

This cleaner mixes with the oil and helps to loosen dirt, varnish deposits and ‘black sludge’ from engine parts, so they are drained away with the old oil. It helps to neutralise acid residues in the oil and is suitable for both petrol and diesel engines. Oil System Flush typically works within 5 to 15 minutes.

Oil System Flush is a good choice during a regular oil change. You can consider it a preventive measure for light to moderate contamination. Afterwards, you change the oil and filter so the system runs again with clean oil.

Step-by-step guide for using Oil System Flush

Always follow the instructions on the packaging and do not exceed the recommended running time.

  1. Let the engine run until warm.
  2. Switch off the engine.
  3. Add Oil System Flush to the oil.
  4. Let the engine idle.
  5. Switch off the engine.
  6. Drain the warm, old oil.
  7. Replace the oil filter.
  8. Fill the engine with fresh oil.

Flushing the engine with Flushing Oil when internally contaminated

If there is internal contamination, it is advisable to go a step further. Then we recommend Flushing Oil. The favourable choice of viscosity, high-quality base oils and special detergent and dispersant additives make Flushing Oil extremely effective.

Flushing Oil contains additives to prevent wear, corrosion, and foaming. It is also suitable for use when the old engine Oil contains a lot of condensation or white sludge. The recommended operating time is typically around 20 to 30 minutes for both diesel and petrol engines.

Flushing Oil is a good choice when there is significant internal contamination. It cleans more intensively than a cleaning agent added to the old oil. You can also use it before switching to a different or higher quality oil.

Step-by-step guide for using Flushing Oil

Beforehand, check that the engine has sufficient oil pressure and only run the engine at idle during flushing.

  1. Let the engine run until warm.
  2. Switch off the engine.
  3. Drain the warm, old oil.
  4. Pour Flushing Oil into the empty engine.
  5. Let the engine idle.
  6. Switch off the engine.
  7. Drain the warm flushing oil.
  8. Replace the oil filter.
  9. Top up the engine with new engine oil.

Heavy contamination? Choose Flushing Oil Pro and Neutralizer Oil Pro

For a professional cleaning of heavily soiled engines, it is advisable to opt for a thorough approach with Flushing Oil Pro and Neutralizer Oil Pro. Thanks to Flushing Oil Pro, you can tackle deposits, ‘black sludge’, and more like never before.

For a thorough cleaning of heavily soiled engines, you can opt for Flushing Oil Pro in combination with Neutralizer Oil Pro. Flushing Oil Pro has been developed to loosen heavy deposits and ‘black sludge’ in engines with severe internal contamination.

Because Flushing Oil Pro is even stronger than regular Flushing Oil, it’s important to also rinse with Neutralizer Oil Pro after using Flushing Oil Pro. This product has been specially developed to completely remove any residue from the flushing agent and clean the engine.

This combination of products is recommended when there is heavy contamination and no oil change has taken place for a long time. Changing the oil in combination with the flushing process often prevents costly repairs.

Step-by-step guide for using Flushing Oil Pro and Neutralizer Oil Pro

  1. Let the engine run until warm.
  2. Switch off the engine.
  3. Drain the warm oil.
  4. Pour Flushing Oil Pro into the empty engine.
  5. Let the engine idle.
  6. Switch off the engine.
  7. Drain the warm flushing oil.
  8. Replace the oil filter.
  9. Pour Neutralizer Oil Pro into the empty engine.
  10. Let the engine idle.
  11. Switch off the engine.
  12. Tap again.
  13. Replace the oil filter again.
  14. Top up the engine with new engine oil.

What are the costs of flushing an engine?

Do you choose a cleaning agent like Oil System Flush? This works out at about €17 for a 310ml bottle. One bottle typically allows you to treat 4 to 6 litres of oil. You can add the costs of new oil and a new oil filter to this.

Taking it a step further with Flushing Oil? Then a 1-litre bottle costs around 14 euros. For a professional clean, opt for Flushing Oil Pro and Neutralizer Oil Pro. Flushing Oil Pro costs around 80 euros and Neutralizer Oil Pro around 68 euros.

Flushing almost always offers significant benefits and better performance when it comes to oil consumption. If you have it done by a professional mechanic, you will naturally also have to factor in labour costs.

Clearing out ‘black sludge’? Order everything from AB Marine Service

In the case of a dirty engine, flushing is necessary. It ensures a clean engine with better lubrication, prevents increased wear, and extends the engine’s lifespan. It is particularly necessary for engines that idle or do not reach operating temperature, to remove deposits.

Do you also want to keep your engine in optimal condition? With us, you can order everything you need to get this job done. If you have any questions, please feel free to contact us. We’re happy to help.

Posted on Leave a comment

Connecting a Bilge Pump: A Step-by-Step Guide to Safe Installation

With a boat, there are countless ways water can find its way in. Some rainwater often ends up in the bilge. The solution for dampness and dirt in the bilge is a reliable bilge pump.

The bilge is the lowest part of a ship, where the two sides meet to form the keel. This is where water, oil, mud, and other rubbish can collect. You ideally want to keep this area clean and dry.

The solution for dampness and dirt in the bilge is a reliable bilge pump. At AB Marine Service, you’ll find automatic bilge pumps that do the job themselves as soon as there’s water in the bilge. That way, you don’t have to keep an eye on whether pumping is needed.

What a bilge pump does

The bilge pump has a number of functions. Without a bilge pump, your vessel could become heavier, unstable, or sustain damage. In the worst-case scenario, it could even sink your boat. Naturally, we’d rather avoid that.

Pumping bilge water

The main job of the bilge pump is to pump out water that’s ended up in the bilge. This could be rainwater, or water that’s got in through a leak or spray. That’s why a bilge pump is always fitted at the lowest point of the bilge, because water collects there and can be pumped out efficiently.

Protection from oil and grime

The bilge can accumulate much more than just water. Think of small residues of oil, dirt, or even diesel. A strong pump prevents this muck from building up and potentially causing damage. It’s important, however, to regularly check the pump and hoses for blockages or debris.

How does a bilge pump work?

There’s a range of bilge pumps on the market. The key difference is between manual and automatic models.

Manual bilge pump with switch

With a manual bilge pump, you operate the pump yourself using a switch or a control panel. This allows you to decide when to turn the pump on and off. You’ll need to be the one monitoring whether pumping is actually required, though.

Automatic bilge pump with built-in float switch

When a pump has automatic operation, it has a float switch or built-in float. As the water level rises, the float moves up, and the pump switches on automatically. It then pumps out the bilge water until the level drops below a certain point again.

What do you need to connect a bilge pump?

Connecting a bilge pump is a job most DIYers can manage quite well. The aim is a safe and watertight connection for the pump, with no risk of a short circuit. Make sure you have the following bits and bobs to hand:

Connecting a bilge pump: a step-by-step guide/strong>

Right then, time to get that bilge pump wired up. We’ll walk you through it in five straightforward steps. If you’re missing a bit or fancy asking a question, just give our experts a shout.

Step 1: Choose the right spot

Find the location of the bilge pump. You’ll want the pump in the lowest part of the hull, as that’s where all the water will drain. Ensure the pump is securely mounted and easy to install. Allow ample space for the hose and wiring.

Step 2: Connect the hose

Attach the drain hose to the pump. Use one or two hose clamps to create a secure and watertight seal. Route the hose upwards, ensuring the outlet always remains above the waterline. This prevents water from flowing back down the hose.

Step 3: Wiring and Fusing

Connect the pump to the boat’s power supply. Always fit a separate fuse between the pump and the battery to prevent short circuits or overloading. Neatly conceal the wiring and use waterproof connectors or heat-shrink tubing to prevent corrosion.

Step 4: Switch or auto mode

Figure out how you want to run the pump. For manual operation, you’ll connect the pump to a switch or a control panel. If you’re going for an automatic setup, you’ll use a float switch. A lot of bilge pumps give you the option to have both.

Step 5: A thorough test

Run a pre-sail installation test. Pour a controlled amount of water into the bilge and check if the pump activates. Ensure there are no leaks at the connections and that the drainage functions as expected. A test run will prevent unwelcome surprises out on the water.

Practical tips for a reliable bilge pump

For the bilge pump to work reliably, here are a few more tips. We’ve put them in a list for you.

  • Consider placing the pump in a holder or fitting a small shelf beside it. This will stop the pump from getting mucky or sitting directly in any loose debris.
  • Never install wiring without a fuse. Such a simple fuse can save your entire vessel in the event of a short circuit.
  • When selecting a pump, be sure to factor in its capacity. For bigger boats, you’ll likely require a pump with a greater litres-per-hour output.
  • Always use a non-return valve. This prevents the pumped-out water from flowing back and refilling your bilge.

Frequently asked questions about bilge pumps

We regularly get the same questions about bilge pumps. Therefore, we’re providing some answers to such questions. If your question isn’t here, please don’t hesitate to get in touch.

My bilge pump keeps running. What now?

If your automatic bilge pump keeps running, then the float switch is sticking. This can be due to wear and tear or the build-up of dirt or oil. If the pump continues to run, clean it and see if that helps. If not, it’s probably time for a new pump.

Where should the drain hose go?

Ensure the drainage hose always exits above the water level. This allows the water to escape freely. We advise against excessive bends in the hose and suggest using hose clips to prevent any leakage.

Does the pump always have to operate automatically?

No, that’s not strictly necessary. Some people prefer manual control to maintain more oversight. Generally, an automatic pump is considered safer, as it will activate even if there’s a leak and you’re not on board.

How do I know if it’s working without water in the bilge?

Ideally, you should test the bilge pump every few weeks when the boat is in the water. Especially if the boat’s been moored for a while or is connected to shore power. Just chucking a bucket of water into the bilge is enough to see if the pump’s still doing its job.

What do you need for big or small motorboats?

For small motorboats, a standard bilge pump will suffice. On bigger boats, you’ll have a deeper bilge and might need a pump with a higher capacity. In that case, it’s sensible to opt for a bigger, more powerful pump.

Buy a bilge pump and more at AB Marine Service

At AB Marine Service, we’ve got everything you need for your boat. Order your automatic bilge pump with built-in sensor, including all the connection materials you’ll need to get started safely on board. Got any questions? Don’t hesitate to get in touch. We’re happy to help.

Posted on Leave a comment

Getting your boat ready for summer

zomerklaar maken van je boot

It’s almost time, the sailing season is about to start!

Our team can’t wait to get out on the water. To ensure a carefree sailing season, a summer check is, of course, essential. By following the steps in our summer check, you’ll know your vessel is completely ready for a fantastic year of sailing.

When do you get your boat ready for summer?
You get your boat ready before the sailing season begins. Most boat owners get their boat ready for summer in March.

In this article, you’ll find the 4 steps to get your boat ready for summer, the necessary products, and all information in pdf format so you can easily keep it. Ready? Let’s get started!


1. The engine

As your boat has been stationary for a number of months, it’s important to check the engine. If you have winterised the boat, a brief check is sufficient.

SUPPLIES:

DURATION:
About 30 minutes

STEP 1:
First, check that the area around the engine is clean and dry. There should be absolutely no visible oil or water leaks. Also, check the pipes for this immediately. Don’t forget to check all the hoses for any signs of cracking.

STEP 2:
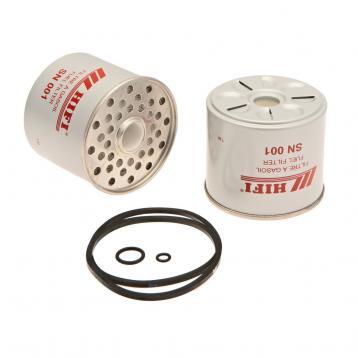
Replace the fuel filters and take a few spares with you for the journey.

STEP 3:
Change the engine oil if this hasn’t been done before winter.

STEP 4:
Check the V-belts and adjust their tension. If you can’t turn them more than a quarter turn between your thumb and forefinger, they are tight enough. Are the V-belts worn? Replace them then, to prevent you from breaking down in the middle of the water. Also ensure you have a spare on board, should it be necessary to replace the belts during the season.

STEP 5:
Check the coolant, oil level and battery.

STEP 6:
Start the engine and check that the water is being drawn in and circulating correctly.

STEP 7:
Check the impeller, replace it if necessary and carry a spare impeller with you for the journey.


2. Hull, deck and rudder

Now it’s time to check the hull, the propeller shaft and the tarpaulin.

SUPPLIES:

  • Antifouling
  • Anodes
  • Grease
  • Tarpaulin cleaning supplies

DURATION:
About one hour (excluding antifouling application)


STEP 1:
antifouling is essential for extending the lifespan of your boat and preventing high fuel consumption caused by growth. Check the underside of the boat and apply a new coat of antifouling if necessary. Is your boat in saltwater? Then you’ll need to apply a new coat of antifouling sooner than if your boat is in freshwater.


STEP 2:
Check for play in the outer bearing by moving the propeller shaft at a right angle to the direction of rotation. The play should be a maximum of 0.50 to 1 mm. In any case, it is important that it does not rattle and turns smoothly.


STEP 3:
The anodes on your vessel can degrade significantly within a year. Check if they need replacing to prevent damage to other metal components. Replace an anode when more than +/- 60% of its original mass has worn away. For freshwater boating, you need an aluminium anode; for saltwater boating, fit zinc anodes to the hull. Are the sensitive parts on your aluminium-hulled vessel still suffering
from corrosion? If so, fit magnesium anodes. Be aware, these can corrode faster than usual! If your vessel is in brackish water, aluminium is the best choice.

STEP 4:
Have algae, mussels, and barnacles grown on the propeller shaft? Sand or paint them to prevent a reduction in drive efficiency. Also, check if there is too much play in the propeller shaft. For a greased propeller shaft, check if the outer gland is lubricated by grease. If not? Then there can be two causes
for this: you are using too little grease or the clearance on the propeller shaft is too large, causing grease to leak away too quickly. If you have used too little grease, this is of course easily solved by greasing more and more regularly. Is there too much clearance on the propeller shaft? Then contact us so we can provide a suitable solution.


STEP 5:
Before launching, the sterntube and propeller shaft can be greased and checked. Some types have a special grease nipple, others need to be dismantled. Top Tip! When launching, the sterntube needs to be properly vented, otherwise it will run dry. By squeezing and deforming it, you can create an opening for the air to escape.


STEP 6:
With good maintenance, a tarpaulin can last for years. Clean the tarpaulin and check all zips, straps, and seams. Take your tarpaulin to a specialist for any repairs.


STEP 7:
Check the condition of the ropes and ensure all necessary lines are on board. Are there any dirty ropes? If so, wash them in the washing machine at 30 degrees. Frayed ends of ropes should be sealed with a flame to prevent further fraying.


3. Gas & Electricity

Checking the gas and electricity connections is extremely important to prevent dangerous situations. Have the connections inspected by an accredited company; you can often find them at larger marinas.

SUPPLIES:

  • Hose
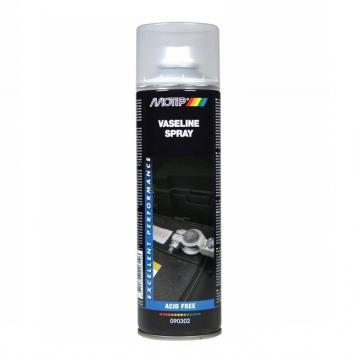
  • Vaseline spray

DURATION:
About 30 minutes

STEP 1:
Is the gas hose damaged? Always replace it then. Regardless, it’s important to replace the hose after five years, even if it still looks good. The year of manufacture is indicated on the hose.

STEP 2:
Check all electrical connections, the lights, and the plugs. Replace rusty plugs as they pose a fire hazard.

STEP 3:
Check the fluid level of the batteries if they have caps. You cannot check a sealed battery. If you are unsure about the condition of the battery, you can have it tested. A marina or car garage often has the right equipment. Clean the terminals and fasten them securely. Are the battery terminals turning green with corrosion (also known as cauliflower)? Then the battery is probably leaking at the terminals. In that case, replace the battery. Afterwards, lubricate the terminals with vaseline.


4. Navigation & Safety

Lastly, it’s important that you check the navigation and safety. This way, you can head out onto the water with your boat worry-free. Enjoyment guaranteed!

SUPPLIES:

  • Bike pump
  • First aid kit parts

DURATION:
About 30 minutes

STEP 1:
Check that the nautical charts are still up-to-date. Ensure your compass, depth sounder, gps, and log are in good working order and that the relevant regulations are aboard your boat. Don’t forget to check if the speedometer wheel is loose.

STEP 2:
Are the life jackets in their designated place and still in good condition? Test the jackets by inflating them with a bicycle pump and checking for leaks. Do not do this by mouth, as moisture can get into the jacket. Life jackets used in recreational boating must be inspected every two years. The lifespan of inflatable life jackets is ten years. For an automatically inflatable vest, it is important to replace the gas cartridge and salt tablet after each use.

STEP 3:
Also take out the first-aid kit and replenish it if necessary. Check any flares, distress rockets, and fire extinguishers for their expiry dates.

5. Recommended products for preparing your boat for summer

6. Download the manual


You have completed all the steps to get your boat ready for summer.

Please remember that the steps you take will vary from boat to boat. We have listed the necessary items to get your boat ready for summer so you can easily order them.

The AB Marine Service team wishes you a great sailing season!

Posted on Leave a comment

Winterising your boat

winterklaar maken boot

Getting your boat ready for winter is always important, whether you’re keeping it in the water or storing it ashore. With AB Marine Service’s winter Check, you can be sure your boat is fully prepared for winter and you’ll be back out on the water enjoying it again sooner when the boating season starts. You get your boat ready when you’re no longer going to use it this season. Exactly when this is will, of course, vary from person to person. Most boat owners get their boats winter-ready in October. Getting your boat ready for winter consists of 6 steps. In this article, you’ll find the 6 steps to get your boat winter-ready, the necessary products, and all the information in pdf format so you can easily save it.

  1. The engine
  2. Technical parts
  3. Water supply
  4. The hull and the deck
  5. Sailing boat
  6. Equipment
  7. Required products
  8. Download the manual

1. The engine

At the end of the boating season, it’s crucial to winterise your boat’s engine. Don’t skip this step, as your engine could otherwise suffer significant damage. To begin, it’s important to know whether your boat has an open or closed cooling system. A closed cooling system is filled with coolant. Not much can go wrong with this system. Do you have an open cooling system? In this case, water from the waterway is used to cool the engine. Absolutely no water must remain in the engine over winter. Follow the next steps to get your engine winter-ready.

SUPPLIES:

  • Antifreeze

DURATION:
Average 15 minutes


STEP 1:
Close the water inlet valve. Do you not have a draining valve? If not, make sure to blow the water out of the valve before closing it. A valve with water in the ball will otherwise still break.


STEP 2:
Unscrew the weed filter.


STEP 3:
Ensure there is absolutely no water left in the engine. Look in the manual for the drain points. These points are often found on the side of the engine and underneath the manifolds.


STEP 4:
Is all the water out of the system? If so, you can proceed to the next step. You can optionally blow out the system with compressed air first before continuing.


STEP 5:
Run the engine while you slowly pour antifreeze into the weed filter, or place the supply hose into the jerrycan with antifreeze and then start the engine. Switch off the engine when antifreeze starts flowing from the exhaust of the cooling water system and catch the liquid in a bucket. Do not let it enter the waterway, as antifreeze is very harmful to the environment. Alternatively, use our biodegradable antifreeze.


STEP 6:
For boats that remain in the water over winter, the valve must also be filled with antifreeze. You can do this by filling the weed filter with antifreeze and opening and closing the inlet valve once, so that antifreeze seeps into the ball valve. Or even better, blow air into it and seal the valve under pressure so that only air is present.
And note, for boats that are ashore, keep the valve open to drain all water from the ball valve!


STEP 7:
Change the engine oil and replace the oil filter and the fuel filter. Diesel and fuel attract water. After the sailing season, it is advisable to replace these with new oil and filters to drain moisture in advance. New oil also protects the engine better due to the various additives.


2. Technical parts

After winterising the engine, it’s time for the technical aspects. During this step, we’ll cover the gas and electrical supplies, and the technical components.


SUPPLIES:

  • Grease for lubricating parts
  • Cleaning supplies and bucket
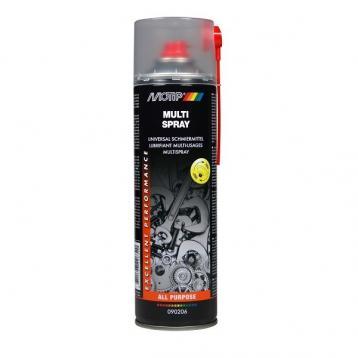
  • Anti-corrosion spray (multi-purpose spray)

DURATION:
Average 1-3 hours


STEP 1:
Disconnect the gas bottles and store them somewhere off the boat, for example at home. It’s best to store the bottles in a dry, well-ventilated place. Check the gas hoses and connections and replace them in good time. Any sign of wear means the parts need replacing to prevent accidents. Have gas hoses replaced by an authorised specialist (at least every three years).


STEP 2:
When batteries discharge, the acid is drawn into the plates. In winter, this can freeze. It is advisable to keep batteries fully charged. For example, you could opt to charge batteries occasionally with a trickle charger. You can also remove the batteries from board and store them in a dry place. It is still advisable to fully charge the batteries completely from time to time. Also check if the batteries need topping up with distilled water.


STEP 3:
Remove electrical equipment from board, as far as possible. Store the equipment in a dry and warm place. spray the exposed points and contact points on board with a moisture-repellent spray to prevent corrosion.


STEP 4:
Rotating parts such as the steering column, winches and gears must be checked. In addition, ensure that parts such as gears, the rudder tube and the propeller shaft are lubricated. During lubrication, force the water out so that it cannot freeze in the tube.


STEP 5:
Remove water from the bilge and clean the bilge thoroughly. Also, clean and dry the gas locker thoroughly.


STEP 6:
Check the level and condition of the coolant using our Glycol meter. Remove the impeller during the winter period so that it does not deform in the same position. Store the impeller in a dark place (the rubber is not UV resistant). Tension or replace the V-belt. Replace the coolant approximately every three years or if it is dirty and the frost resistance is too low (-25 degrees is the limit).


3. Water supply

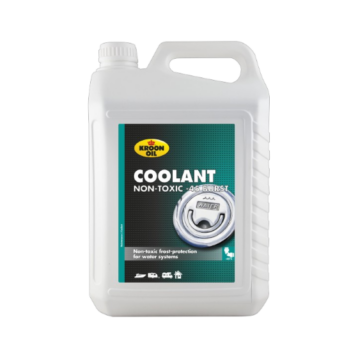
Now that the technical parts are ready for winter, we’ll move on to the water supply. Think about the toilet and the tap. Be aware that you must use a non-toxic antifreeze! The antifreeze used for cars is often toxic and therefore cannot be used now. Non-toxic antifreeze is better for the environment, but also for the pump’s rubber seals. Regular coolant will damage these. Please note: it’s not enough to pump your toilet dry, as residual water can remain in bends and corners.

SUPPLIES:

  • Non-toxic antifreeze
  • Cleaning supplies
  • Sponge
  • Optional: lubricant for the valves e.g. petroleum jelly or multi-spray

DURATION:
Average 30 minutes to 2 hours

STEP 1:
Close the skin fitting and disconnect the hose from the toilet’s water inlet. Hang the hose in the jerrycan with antifreeze. Pump the antifreeze through the toilet and close.

STEP 2:
Empty the fresh water tank completely. The last bit of water in the tank can be removed via the inspection hatch with a sponge, or hire a wet vacuum cleaner connected to the drain point, then turn on the taps one by one. Clean the tank. No water should remain in the hoses and water pumps. Don’t forget the outside shower and tap.

STEP 3:
Drain the water heater. Do you have an electric water heater? If so, disconnect the power first. To ensure all water is out of the system, disconnect the top hose from the water heater (hot water) and blow compressed air through the system. By opening each tap one by one, you will blow out all remaining water. Be careful not to build up too much pressure in the system; always keep a tap open.

STEP 4:
Fill all remaining valves with antifreeze. To do this, pour antifreeze into the supply point or hose and open the valve once so that antifreeze remains in the ball.

STEP 5:
Is your boat ashore? If so, drain the water from the valves and then close them. Cold and moisture can enter through open valves. It is advisable to lubricate the valves to prevent corrosion.

We’re halfway there!
Time to get the outside of your vessel shipshape for winter.

4. The hull and the deck

The inside of your ship is all ready for winter. Time to make the outside of your boat ready for winter.

SUPPLIES:

  • Cleaning supplies
  • Wax (optional)
  • Paint (optional)
  • Grease for rubber
  • Antifouling (optional)
  • Boat cover

DURATION:
Average 1-3 hours

STEP 1:
Thoroughly clean the hull and the deck. If dirt remains on your boat during winter, it can become even more embedded. Also clean components such as fenders.

STEP 2:
Is your boat made of polyester? If so, apply a coat of wax. Polish the wax off in the spring.

STEP 3:
Does your boat have any bare patches? Treat any areas on the boat where the paint has worn away to protect them.

STEP 4:
To prevent rubber from cracking, lubricate all window and hatch rubbers with petroleum jelly spray.

STEP 5:
Leave internal hatches and lockers open for ventilation to prevent mould.

STEP 6:
Examine the underside of your boat. Can it last another year or does it need attention? If the underside of the boat requires treatment, you can apply antifouling paint.

STEP 7:
Protect your boat with a cover if you have one. A cover helps prevent frost damage.

STEP 8:
Secure everything properly! It can get quite windy in winter, and ropes and covers can flap about, quickly causing wear and tear or damage.


5. Sailboat

Are you preparing your sailboat for winter? Then there are some extra parts to consider.

SUPPLIES:

  • Cleaning supplies
  • Lubricant for roller systems

DURATION:
Average 30 minutes to 1.5 hours

STEP 1:
Remove the sails and running rigging (ropes and wire) and store them in a dry place.

STEP 2:
Grease the furling systems for the jib or mainsail.
STEP 3:
Inspect the standing rigging. Is everything still intact? Are there any burrs or kinks? Are all split pins present and in good condition?

STEP 4:
Clean all blocks and sheaves.


6. Equipment

In the final step of the checklist, you clean the equipment and prevent further damage from cold and damp.

SUPPLIES:

  • Cleaning supplies
  • Lubricant for roller systems

DURATION:

Between 30 minutes and 3 hours

STEP 1:
Remove all cushions, clean the cushion covers (if possible in the washing machine) and store them in a dry place.

STEP 2:
Thoroughly clean the boat. Remove all food and perishable items from board. Bottles or cans of drinks can also

STEP 3:
Remove other items that are not resistant to moisture and/or cold.

STEP 4:
Remove clothing and life jackets from the vessel. Check that the life jackets are still in good condition and replace if necessary.

STEP 5:
Check the fire extinguishers and have them inspected if necessary.

STEP 6:
Place moisture absorbers in all areas of the boat to prevent dampness.

7. Recommended products for preparing your boat for winter

8. Download the manual


You have completed all the steps to prepare your boat for winter. Please remember that the steps you follow will vary depending on your boat. Does your boat have any parts where water can remain, or where moisture and cold could cause damage? If so, ensure these parts are also prepared for winter.

Tip: It’s also worth popping down to your boat during the winter. For instance, check that the cover is still secure. It would be a shame to have gone to a lot of trouble preparing your boat for winter, only for it to suffer damage nonetheless.

We wish you the best of luck with preparing your boat for winter!

Posted on Leave a comment

What is an anode and how do anodes work?

anode bij een schroef

Whether you’re an experienced boater or just starting out with tinkering on your own boat, it’s good to know what an anode is. We’ll explain the meaning of an anode, what an anode does, what types of anodes there are, and how they protect your boat from galvanic corrosion.

What is an anode?

An anode is an electrode that functions as a positive electrode, thereby forming the positive pole within an electrochemical cell. It is the electrode along which electrons move when an electric current is generated.

During this process, electrons are central. The anode releases electrons via an external circuit, creating a controlled current flow between the different components. The anode is a charged plate, often positively charged, which releases an equivalent number of electrons and leaves an equivalent number of electrons behind in the material.

An anode is an essential part of your boat’s protection system against galvanic corrosion. This corrosion occurs when different metals come into contact with an electrolyte, such as distilled water, fresh, salt, or brackish water.

How does a boat anode work?

On a boat, the anode is deliberately the least noble metal. This electrode is used to protect other metal components. The anode forms the positive pole, while the cathode, also called the cathode, is the negative pole.

The cathode is the electrode that actually accepts electrons, while the anode gives them up. This interaction causes current to flow from the anode to the cathode, thereby preventing corrosion damage. This principle is very similar to what happens during electrolysis, but applied as a protective mechanism.

Through this action, current flows from the anode towards the cathode, creating a controlled current. This electric current ensures that it is the anode itself that corrodes, not the important metal parts. This protects components such as the propeller, the propeller shaft, and other metal components.

Smalle Plaat Anodes speciaal vormgegeven anodes voor de montage op trimtab systemen.
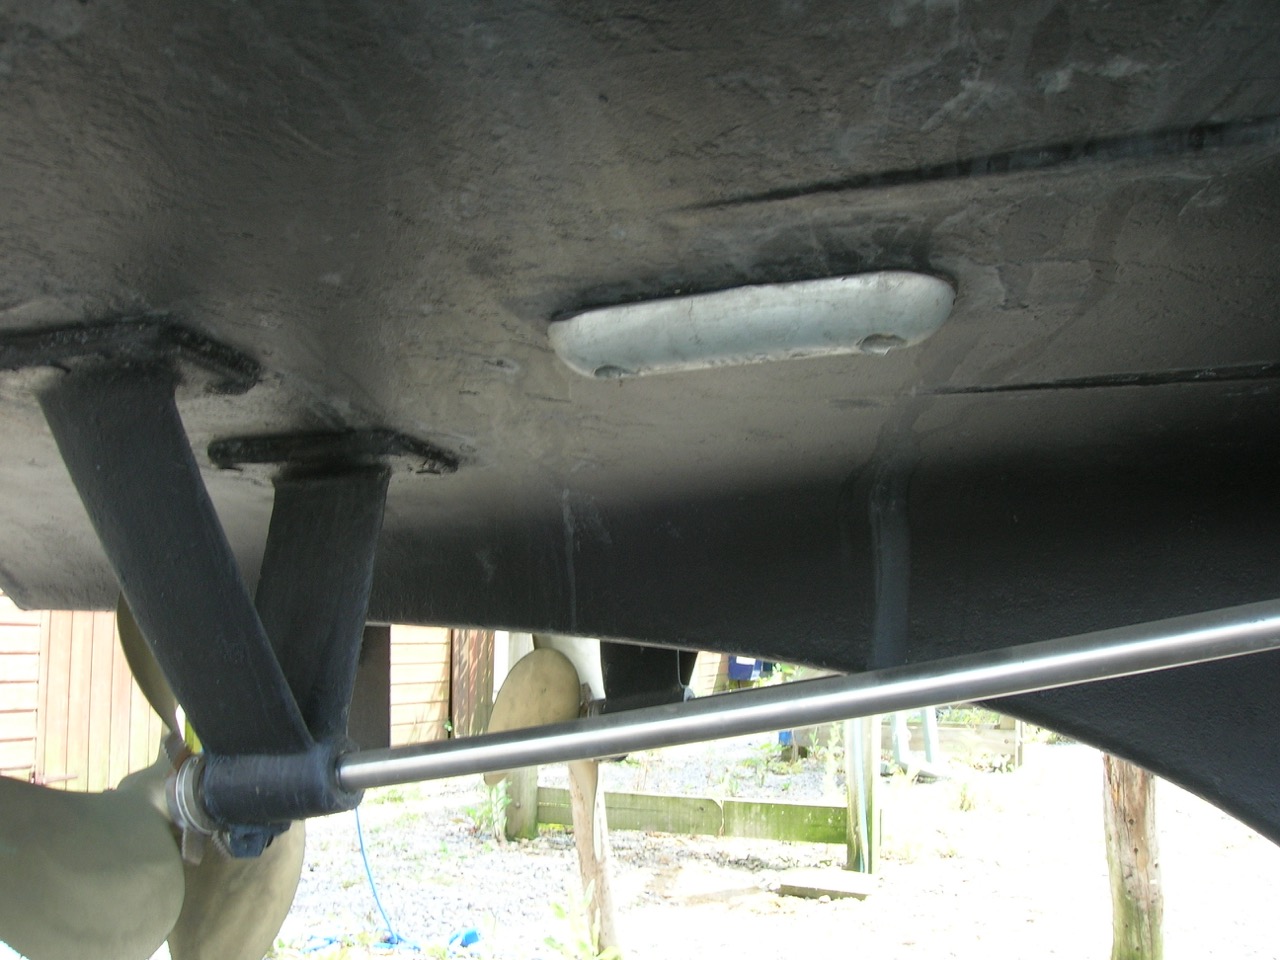
Anodes come in all shapes and sizes, like this anode for trim tab systems.

Types of anodes: magnesium, zinc or aluminium

There are various types of anodes available, each designed for specific water conditions and materials. The most commonly used are zinc, aluminium, and magnesium. These materials gradually dissolve in the surrounding solution or mixture in which the metal is located.

Magnesium anodes: perfect for fresh water

A magnesium anode is most suitable for use in fresh water. Magnesium is the least noble metal of the three and therefore corrodes the quickest. This makes magnesium anodes ideal for use in fresh water, where corrosion is less aggressive. However, it is important to note that magnesium anodes are not suitable for use in salt water, as they would corrode too quickly there.

Zinc anodes: ideal for saltwaterr

A zinc anode is best suited for use in saltwater. Zinc is the least noble metal and is highly resistant to the corrosive effects of saltwater. For boats that primarily navigate the sea or other saltwater environments, zinc anodes are the best choice. They offer effective protection for metal components such as the propeller shaft and the stern gear of vessels.

Aluminium anodes: versatile and lightweightt

Aluminium anodes are very versatile and can be used in both saltwater, freshwater, and brackish water. An aluminium anode is lighter than zinc and offers excellent protection against corrosion. Furthermore, aluminium anodes are more environmentally friendly as they contain fewer harmful substances. These are often fitted to boats that navigate in various waters, as they are effective in both freshwater sailing and saltwater.

Can stainless steel and aluminium be used together on a boat?

A common question is whether stainless steel and aluminium can be used together on a boat. Combining different metals, such as stainless steel and aluminium, can lead to galvanic corrosion, especially in saltwater.

It’s important to choose the right anode to prevent this. For example, an aluminium anode can help minimise corrosion by sacrificing itself instead of the aluminium or stainless steel on your boat. The anode absorbs the electrical current and prevents damage to other metal components.

How often do you need to replace an anode?

Over time, an anode will visibly corrode. Regularly checking and replacing anodes is essential for maintaining your boat. A general rule of thumb is to inspect your anodes at least once a year. If you see an anode has lost more than 50% of its mass, you should replace it.

This applies to all types, whether you’re using zinc, aluminium, or magnesium. Failing to replace the correct anode in good time can lead to serious damage to the metal parts of your vessel.

corroded anode
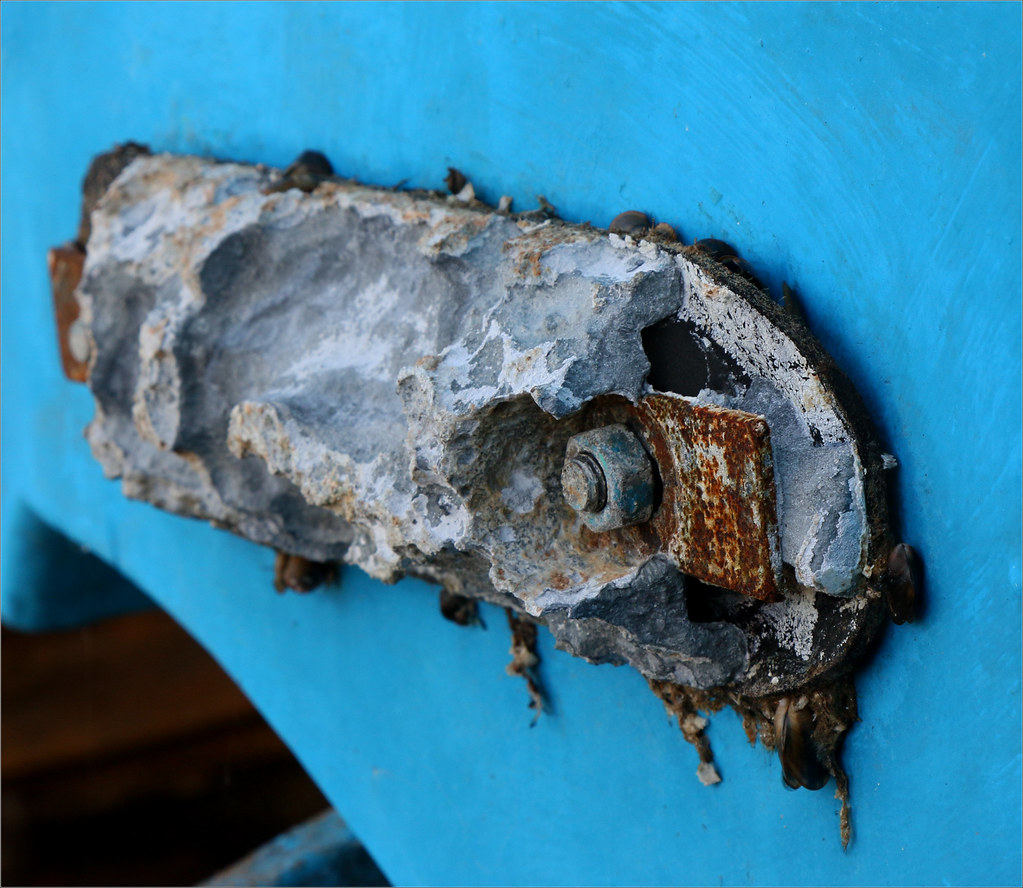
Over time, an anode loses its mass and needs replacing.

How many anodes do you need for your boat?

The number of anodes you’ll need depends on the size of your boat, the type of water you sail in, the amount of metal components that come into contact with the water, and how a component is fed. For smaller boats, one shaft anode might suffice, whereas larger vessels often require several anodes.

The answer to the question ‘how many anodes do I need?’ depends on factors such as the waterline, the presence of an outboard engine, and the materials used. Also consider what type of anode you need, depending on the water conditions and the materials of your boat.

Purchase the correct anodes from AB Marine Service

The use of the correct anodes is essential to protect your boat from galvanic corrosion. Whether you’re sailing in fresh, brackish, or saltwater, choosing the right anodes and replacing them in good time will ensure your boat remains well-protected. Make sure you are properly equipped with the correct anodes and thus prevent unnecessary damage to your vessel.

Posted on Leave a comment

Brass and corrosion: Important information for your boat

Brass is a versatile and popular material in the maritime sector and other industries. It is an alloy of copper and zinc. This unique combination offers numerous advantages such as good electrical conductivity, resistance to corrosion, and an attractive sheen. Over the years, brass has become a favourite for various applications, from decorative items and musical instruments to marine parts, plumbing fittings, and electronic components. However, brass also presents its challenges, especially in damp and salty environments.

Brass corrosion can have serious consequences for the safety and functionality of crucial components, such as skin fittings and seacocks. This blog tells you all about the properties of brass, the causes of corrosion, and how CR brass offers the definitive solution for durable and safe application in damp environments.

How does corrosion occur in brass?

Most metals are subject to corrosion, but in the case of brass, the process of dezincification plays a particularly significant role. Additionally, galvanic corrosion can occur, especially when brass is combined with other metals in a damp environment.

Dezincification: the hidden threat

Dezincification occurs when the zinc content in brass is affected by a chemical reaction with water and oxygen. This process leaves behind a weak, porous material primarily composed of copper. Brass fittings, such as pipes, valves, and skin fittings that are constantly in contact with seawater, are susceptible to this form of corrosion.

  • Key factor: The percentage of zinc in the alloy determines how quickly dezincification occurs. The higher the zinc content, the greater the risk.
  • Damp environments: In saltwater, dezincification is accelerated, leading to structural weakness in parts that play a crucial role in the safety of your boat. This corrosive effect can be particularly severe below the waterline.

Galvanic corrosion: interaction between metals

Galvanic corrosion occurs when brass comes into contact with dissimilar metals, such as iron, nickel, or aluminium. In combination with seawater, which acts as an electrolyte, an electric current is generated that attacks the less noble metal in the combination.

How to recognise corrosion on your boat parts?

Spotting corrosion early is crucial to prevent damage and dangerous situations. Regular inspection and maintenance can significantly extend the lifespan of your boat parts.

Visual signs

  • Discolouration: Brass can develop a green or white deposit due to oxidation. These are early signs of corrosion.
  • Pitting: Small indentations on the surface indicate advanced galvanic corrosion and should be taken seriously.
  • Loss of shine: Brass that loses its shine has often been exposed to damaging elements, such as salt and moisture.

Functional issues

  • Reduced strength: Dezincification makes brass brittle, meaning it can no longer withstand loads.
  • Leaks: Check through-hulls and shut-off valves for leaks, as these are often the first signs of corrosion.

By combining visual inspection and functional tests, you can identify problems early and limit damage. If you are using brass, these tests are very important.

CR-brass versus standard brass: what are the differences?

In marine applications, not all brass is created equal. The distinction between standard brass and CR brass (dezincification resistant brass) is of great importance, especially in sub-aquatic applications.

Standard brass

  • Composition: Contains a high zinc content, making it more susceptible to dezincification.
  • Applications: Standard brass is suitable for applications in less aggressive environments, such as freshwater areas or above the waterline. It is ideal for decorative applications, light loads, or parts that do not have constant exposure to moisture. Additionally, it is a cost-effective choice for situations where maximum durability is not required, such as temporary solutions or less critical components.
  • Low hardness: Due to its relatively soft structure, standard brass is less suitable for load bearing.

CR-brass

  • Dezincification-free: Due to the use of other alloying elements, such as manganese and a lower zinc component, CR brass is more resistant to corrosion.
  • Higher strength: Ideal for applications where durability and safety are crucial, such as through-hulls and brass plates below the waterline.

Choosing the right type of brass is an important factor in ensuring the safety and performance of your boat.

A CR brass ball valve offers excellent corrosion resistance, even in saltwater environments.

CR-brass: the solution for below-waterline corrosion

For underwater applications, CR-brass is the best choice. This type of brass is designed to perform in the most challenging conditions, where standard brass would quickly fail.
Advantages of CR brass

  1. Corrosion resistance: Due to its unique composition, CR brass remains strong and durable, even in saltwater.
  2. Long service life: Thanks to its improved dezincification resistance, CR brass components have a significantly longer service life.
  3. Reliability: Ideal for critical components such as through-hulls, brass profiles, and valves.

By choosing CR brass, you’re investing in quality and safety. You’ll benefit from this product’s most notable properties: it’s dezincification-free, corrosion-resistant, and therefore reliable.

When to choose standard brass or CR brass?

Choosing between standard brass and CR brass depends on the specific application and the environmental factors the material will be exposed to.

Standard brass

  • Dry or freshwater environments: Standard brass is suitable for above-waterline applications or in freshwater areas, where corrosion and dezincification are less likely to occur.
  • Cost considerations: For less critical applications, standard brass is a cost-effective option.
  • Light load: In situations where mechanical strength and durability are not crucial.
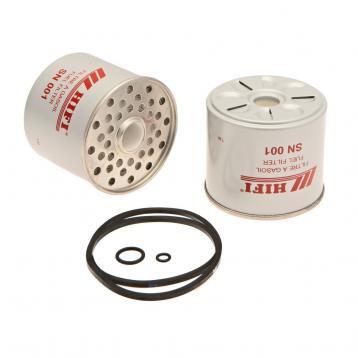
CR-brass

  • Damp environments: For applications below the waterline or in other damp conditions, CR-brass offers better protection.

  • Mechanical load: Use CR brass in parts where strength and durability are important, such as through-hulls and valves.
  • Safety and reliability: For critical components where failure could have serious consequences, such as marine parts.

The importance of proper brass maintenance

Proper maintenance is important to extend the lifespan of brass parts. Here are some practical tips:

  1. Regular inspection: Check components such as hull fittings and valves for signs of corrosion.
  2. Polishing: Regular polishing, for example with a soft cloth, removes oxidation layers and preserves the aesthetic appeal of the material.
  3. Protective coatings: Use coatings to limit exposure to moisture and salt.
  4. Preventive replacement: Replace standard brass parts promptly with CR-brass if they are exposed to damp or salty environments.

With proper maintenance, brass remains a reliable and attractive material in a wide range of applications. This ensures you continue to benefit from its unique properties in various uses.

Buying brass from AB Marine Service

At AB Marine Service, we offer a comprehensive range of brass products, from brass rods and tubes to skin fittings and seacocks, available in both standard brass and CR-brass fittings. Our products are designed to withstand harsh conditions and provide a long service life.

With this extensive knowledge of brass and corrosion, you are now better equipped to make the right choices and protect your boat against the challenges of saltwater. Trust in quality, choose the right materials, and maintain your boat with the expertise of AB Marine Service. contact us to learn more about how we can assist you with your marine maintenance projects.

Posted on Leave a comment

How to replace a V-belt on a marine engine

If you regularly sail, you’ll know how important it is to keep your marine engine running smoothly. The V-belt plays a crucial role in this. This seemingly small component is responsible for driving vital systems such as the alternator, water pump, and sometimes even the power steering pump.

A well-functioning V-belt prevents your engine from overheating or systems from failing. But what if your V-belt squeaks or shows visible defects? In this guide, we’ll explain step-by-step how to replace a V-belt, what to look out for, and why AB Marine Service is the place to get your V-belt.

How to recognise wear on a boat engine’s V-belt?

Wear and tear on a V-belt can take various forms. You’ll often notice it as a squeaking sound when starting the engine or when you accelerate. Other signs include:

  • Cracks on the outside of the belt.
  • Slack or an overly loose belt.
  • Reduced dynamo performance, such as a poorly functioning battery.
  • Engine overheating more quickly.

In marine environments, where moisture and salt are factors, a V-belt often wears out faster than in a car. It is therefore important to regularly check if the V-belt is functioning correctly and to schedule a replacement in good time.

Differences between a V-belt and a multi-belt on ships

You may have heard of a multi-belt, also called a drive belt. While they look alike, there are important differences:

  • A V-belt has a characteristic V-shape, causing it to sit deeply within the pulley grooves. This provides a firm grip and makes the V-belt ideal for driving individual systems, such as the alternator or water pump. V-belts are commonly used in marine engines due to their simplicity and reliability in damp and salty conditions.
  • A multi-belt, also known as a poly-V-belt, is wider and designed to drive several components simultaneously, such as the power steering pump, air conditioning compressor, and alternator. A multi-belt is mainly found in more modern engines with a compact design, where multiple components need to be driven at the same time.

How to replace a V-belt?

Replacing a V-belt is not a complicated job, but it does require the right tools, such as a set of spanners or socket wrenches, and a bit of technical know-how. Follow these steps:

Preparation and checks

  1. Turn the engine off and allow it to cool down completely.
  2. Open the bonnet or inspection hatch and locate the V-belt.
  3. Check the condition of the V-belt and note how it is attached across the pulleys. Taking a photograph may be useful.

Removing the old V-belt

  1. Loosen the tensioner pulley or adjustable bolt to release the belt tension.
  2. Carefully remove the old V-belt. At the same time, check the pulleys for damage.

Refitting the new V-beltr

  1. Check that the pulleys are properly aligned. If a pulley is crooked, adjust it before fitting the new V-belt.
  2. Fit the new V-belt over the pulleys in the same pattern as the old one. Make sure the belt is properly seated and not twisted.
  3. Adjust the tension of the V-belt. It should be firm, but still have a little give (about half a centimetre of play).

Check and testt

  1. Briefly turn the engine over to check that the V-belt is working correctly and is not making any unusual noises.
  2. Check the belt tension again after a short test period, as the belt may stretch.

How to correctly adjust the V-belt after replacement?

A correctly adjusted V-belt is important. The right tension prevents serious damage to components. Over-tightening can cause engine damage, while a belt that is too loose will squeal or slip. Here are some tips:

  • Use a tension gauge if you have one, but pressing down on the belt by hand is also a good method.
  • Ensure the pulleys are aligned. Crooked pulleys can damage the belt.
  • Regularly check the tension, especially if your engine runs a lot.

How often should you replace a V-belt?

Replacing a V-belt depends on how often your boat is used and under what conditions. With intensive use or exposure to saltwater, it may be necessary to replace the V-belt more often than with a car that mainly drives in a dry environment.

As a rule of thumb, you can expect to replace it after every 500 operating hours or when you see signs of wear and tear.

Where can I buy reliable V-belts for marine engines?

For a high-quality V-belt, AB Marine Service is the place to be. We offer:

  • Durable V-belts specifically designed for marine use.
  • A wide range, so you’ll always find the right size and profile for your engine.
  • Expert advice on replacing and maintaining V-belts.

With our products, you ensure that your marine engine continues to run reliably and smoothly, so you can set sail worry-free. Order your new V-belt from our website today.

v snaren klassiek profiel
At AB Marine Service, we sell V-belts in various sizes.

Why regular V-belt maintenance is important

A good maintenance schedule prevents unexpected problems. During a routine service, you can check the V-belt and other parts of your marine engine. This includes the timing belt, tensioner pulley, and pulleys. Regular maintenance extends the lifespan of your engine, saves on high costs, and prevents you from breaking down on the water.

Frequently asked questions about V-belts and multi-belts

How do I know if my V-belt needs replacing?

If you hear a squealing noise when starting up or accelerating, or if you see visible cracks, it’s time to replace the V-belt.

Can I replace a V-belt myself?

Yes, with a bit of technical knowledge, a steady hand, and the right tools, you can do this yourself. Just make sure you adjust the tension correctly.

How much does a new V-belt cost?

The price depends on the type of engine and the size of the V-belt. At AB Marine Service, we offer quality options at a competitive price.

Order your new V-belt from AB Marine Service

With this guide, you’ll know exactly how to replace a V-belt and what to look out for. If you have any questions or want to order a V-belt straight away, get in touch with AB Marine Service. We’re ready to help you!